A single chip or hairline crack in your kitchen backsplash or bathroom floor can ruin the entire look of a room. Most standard fillers dry to a chalky white mess that draws the eye to the damage, making the problem worse instead of invisible.
I’m Mohammad Maruf — the founder and writer behind WellFizz. I’ve spent countless hours analyzing the chemical formulations, pigment systems, and curing mechanisms that separate a seamless, lasting repair from a blobby eyesore in the tile repair market.
Buying a best ceramic tile repair kit means choosing between epoxy blends that chemically bond to the substrate and pigment-mixing strategies that let you dial in your specific shade of beige, gray, or almond.
How To Choose The Best Ceramic Tile Repair Kit
Not all repair kits work the same way. The base resin type, the pigment variety, and the post-cure finishing steps determine whether your repair disappears or screams for attention. Here is what to look for.
Pigment Palette Depth
The biggest frustration buyers report is the inability to match their exact tile shade. Kits that offer seven or more separate pigment colors—including tan, brown, and green for earthy tones—give you a fighting chance at a seamless blend. Kits that only include white and black force you into obvious contrast.
Cure Mechanism: Epoxy vs. UV Light
Two-part epoxy cures chemically and gives you a longer working window, which is ideal for larger repairs or first-time users who need time to blend colors. UV-cure formulas harden in under 90 seconds when exposed to the included light, offering speed but no room for error. Your choice depends on whether you prioritize working time or instant results.
Surface Compatibility and Waterproof Rating
A true ceramic tile repair kit must bond to glazed porcelain, quarry tile, and acrylic surfaces without delaminating after steam cleaning or standing water. Look for kits that explicitly state waterproof and heat-resistant properties, and check whether the cured material remains non-yellowing under UV exposure near windows.
Quick Comparison
On smaller screens, swipe sideways to see the full table.
| Model | Category | Best For | Key Spec | Amazon |
|---|---|---|---|---|
| Fix-A-Floor Original | Premium Adhesive | Re-bonding loose/hollow floor tiles | CoPolymer formula, caulk gun delivery | Amazon |
| NNRepair Quartz Kit | Premium UV-Cure | Countertop chips and small cracks | UV-cure in 60 seconds, 3 colors | Amazon |
| cocomfix Color Match | Mid-Range Epoxy | Invisible chip and crack filling | 7 pigments, epoxy 1:1 mix | Amazon |
| Ankita Color Match | Mid-Range Epoxy | Versatile bathroom/kitchen repairs | 7 pigments, BPA-free formulation | Amazon |
| Hupeyna Fiberglass Kit | Budget Epoxy | Large area fills and bathtub chips | 8 pigments, 250g paste volume | Amazon |
In‑Depth Reviews
1. Fix-A-Floor Original Loose Tile Repair Adhesive
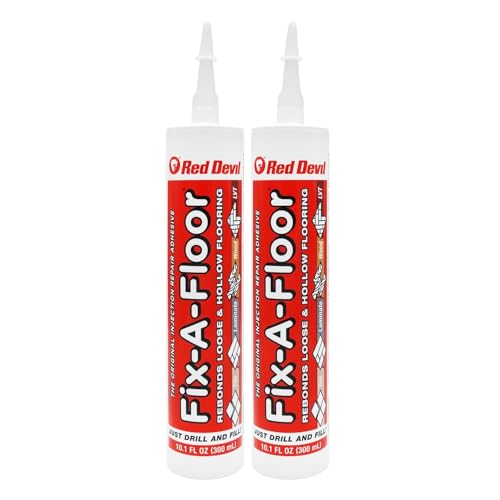
Fix-A-Floor solves a different problem than the other kits in this guide—it is designed to re-bond loose or hollow tiles directly to the subfloor without removing them. The Co-Polymer formula remains flexible after curing, preventing bond failure from subfloor expansion that rigid epoxies suffer. The pack includes four precision tip applicators sized for grout joints from 1/8-inch to 2.5mm, letting you inject adhesive through a drilled hole and fill the void entirely.
Customer feedback confirms that this method works particularly well on older porcelain floors where the original thin-set has degraded. The 24-hour full cure time is reasonable for a structural bond, and the non-toxic formulation makes it safe for indoor use without respirator requirements. Several users noted that the supplied syringe tips can leak under pressure, but switching to a standard caulk gun tip with a pre-cut opening resolves the issue cleanly.
For homeowners dealing with hollow-sounding floor tiles or visible lippage caused by loose adhesive, Fix-A-Floor offers a permanent solution that avoids the cost and mess of demolition. It is not intended for cosmetic chip filling—it is engineered specifically for adhesion failure, and it performs that single job better than any multi-purpose kit could.
Why it’s great
- Structural bond strength exceeds thin-set for loose tiles
- Self-leveling formula fills gaps without pooling
- Four tip sizes cover every common grout joint width
Good to know
- Requires a caulk gun for best results
- Syringe tips may leak if over-pressurized
- Not intended for chip or crack cosmetic filling
2. NNRepair Quartz Countertop Repair Kit DIY
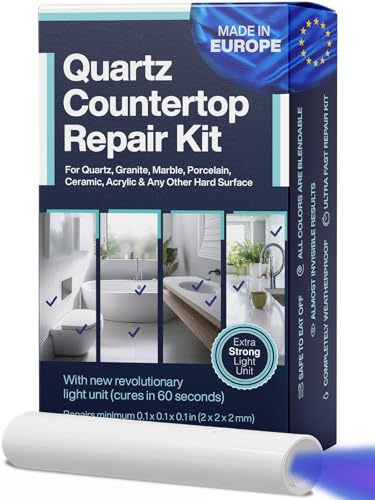
NNRepair takes a fundamentally different approach with its UV-cure resin that hardens in 60 seconds under the included professional blue light unit. This eliminates the 24-hour wait time required by epoxy kits and lets you layer multiple thin applications in a single session. The kit includes three color options—clear, white acrylic, and dark white—plus a polishing paste to match the final sheen of quartz or glazed ceramic.
The proprietary compound is certified non-toxic and food prep safe once cured, which matters for kitchen island repairs where the surface contacts packaged foods. Customer reports highlight that the step-by-step instructions are genuinely beginner-friendly, and the UV light ensures consistent curing depth even in thick applications. A thin chip in white Calcutta quartz was successfully disguised to the point where only the owner could find the repair after sanding and polishing.
Some users noted that the included compound tube is small, making this kit best suited for chips under 1/2 inch rather than large cracks. The polishing paste can eject from its container if mishandled, but the remaining material still works. For anyone who values speed and a true invisible finish over low cost, this kit delivers professional-grade results without calling a contractor.
Why it’s great
- UV-cure hardens in 60 seconds, no overnight wait
- Food-safe and non-toxic after curing
- Includes polishing paste for gloss matching
Good to know
- Small tube limits repair to chips under 1/2 inch
- Blue light must be held at precise angle for even cure
- Practice needed to avoid over-sanding the surface
3. cocomfix Tile Repair Kit Color Match
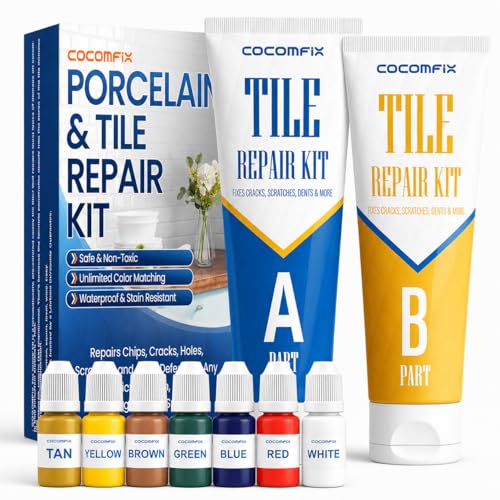
cocomfix combines a 7-pigment color-matching system with a low-odor epoxy formula that is safe for indoor use around children and pets. The kit includes brown, tan, green, and red pigments alongside the standard white, black, yellow, and blue, giving you access to earthy tones commonly found in 1970s and 1980s bathroom tile. The epoxy cures to a high-gloss, waterproof finish that resists yellowing even in sun-exposed areas.
Customer experiences confirm that the filler is easy to mix and applies smoothly into cracks and chips using the included spatula. The main challenge is color matching: the pigment guide provides basic ratios, but achieving an exact match requires patience and multiple test dots. One user repaired a 1970s bathroom gouge successfully after several iterations, reporting that the final result was invisible once the correct shade was dialed in.
For buyers on a tighter budget who still want a wide pigment palette, this kit offers the best compromise between cost and versatility. The 1:1 mix ratio is beginner-friendly, and the cured hardness holds up under foot traffic in entryways and bathrooms. Just budget extra time for color experimentation on a scrap surface before touching the actual tile.
Why it’s great
- Seven pigments include brown and tan for vintage tile
- Low-odor formula works indoors without ventilation hassle
- High-gloss finish matches most factory glazes
Good to know
- Color matching requires multiple test attempts
- Sheen cannot be adjusted to match matte tiles
- Excess filler can leave white residue if not cleaned quickly
4. Ankita Tile Repair Kit Color Match
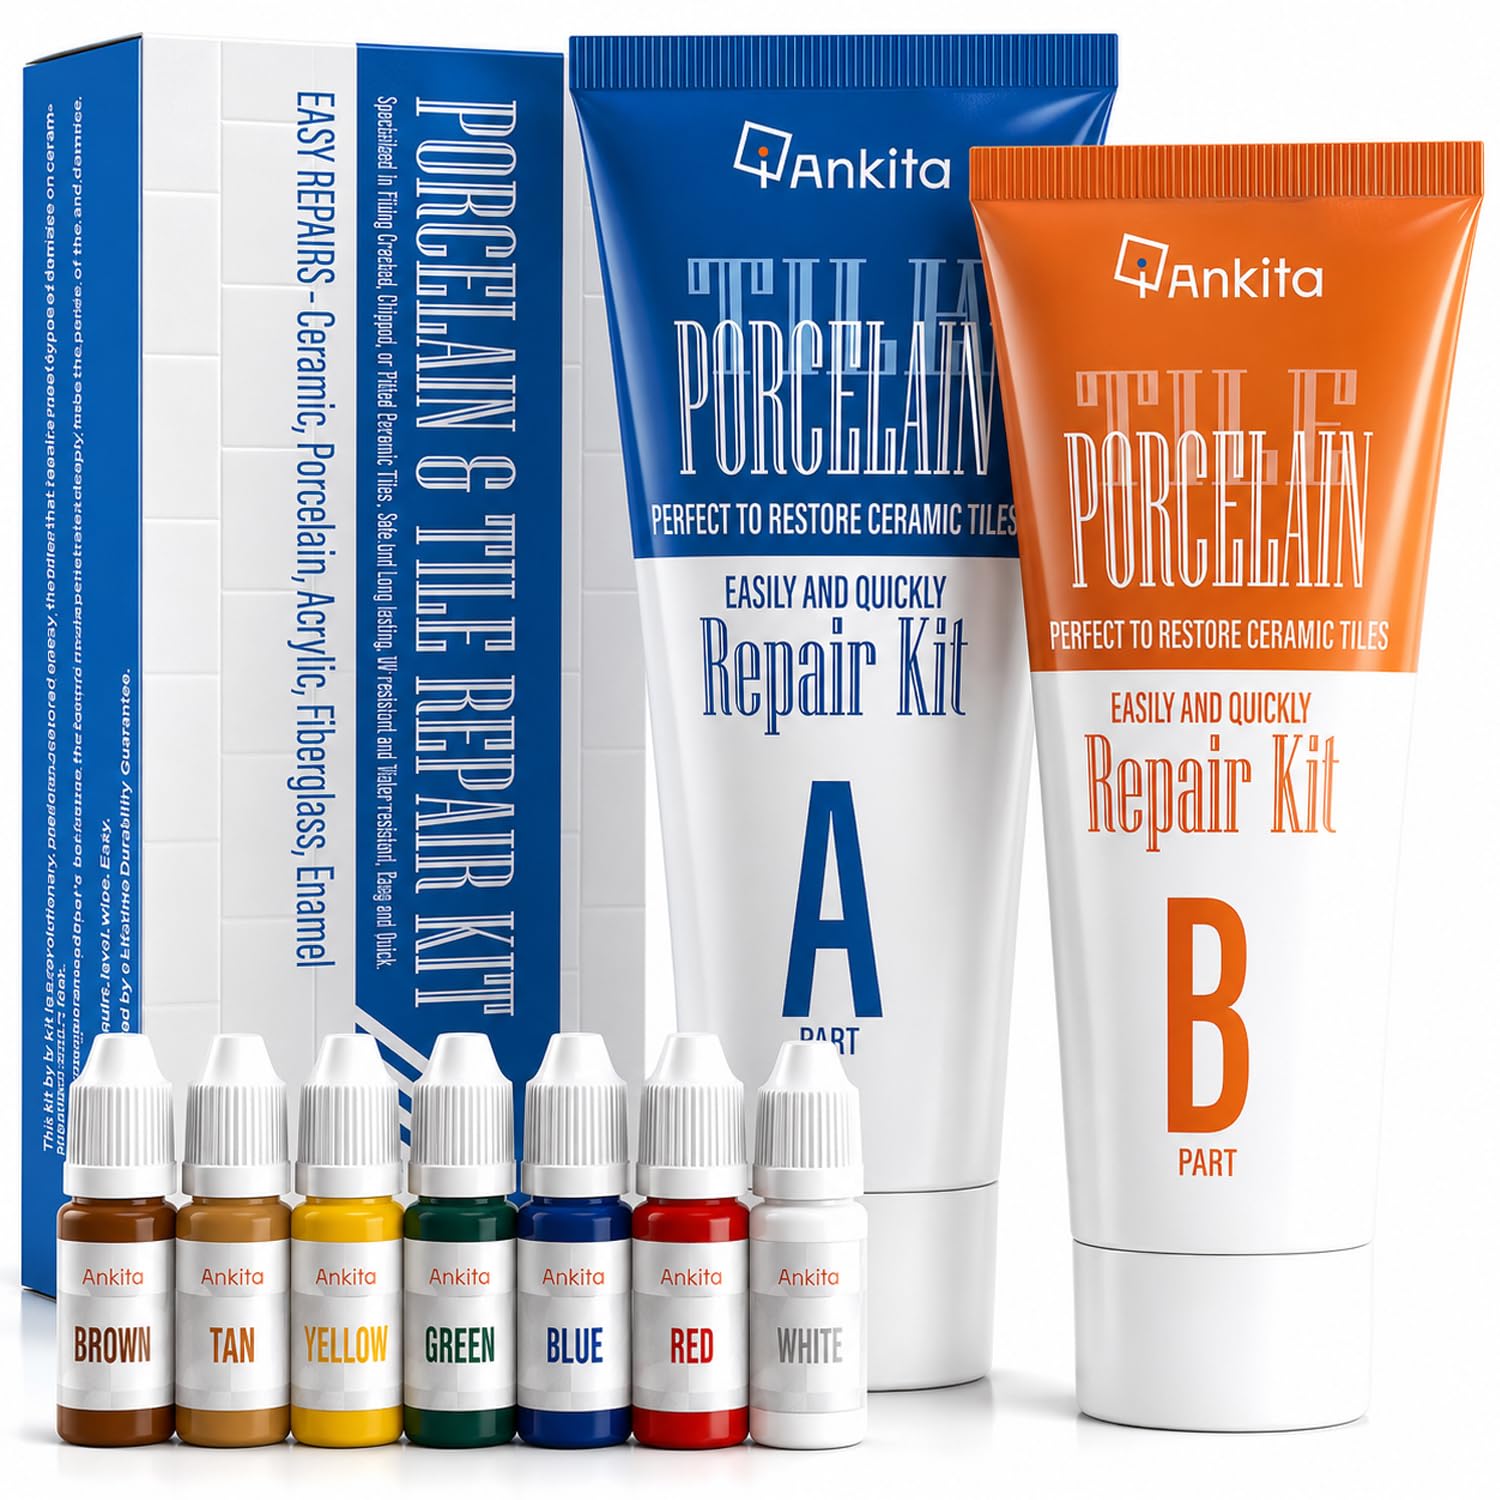
Ankita’s offering mirrors the cocomfix kit in pigment count and epoxy base, but distinguishes itself with a slightly broader color palette that targets modern grays and almond tones popular in contemporary bathrooms. The included instructions walk through preparation, mixing, and curing in a clear sequence that reviewers consistently describe as easy to follow. The cured material resists water, heat, scratches, and stains, making it suitable for shower walls and kitchen backsplashes.
Real-world repair reports show strong results on chipped tub surrounds and enamel sink scratches. One user filled a thin spot in an old porcelain sink successfully, noting that the adhesion held even after hot water exposure. A drawback surfaced in multiple reviews: the repair can yellow or shift tone slightly over several months, particularly on white surfaces that receive direct sunlight. The color shift is subtle but noticeable if the original tile is pure bright white.
For DIYers who need a single kit capable of tackling chips, cracks, scratches, and holes on ceramic, porcelain, acrylic, and granite, Ankita provides the widest material compatibility in the mid-range tier. The included components—Part A, Part B, and pigment set—are straightforward, but the small pigment vials require careful handling to avoid spills. Keep a wet rag nearby during application to wipe excess before it cures.
Why it’s great
- Broadest material compatibility for multi-surface repairs
- Clear instruction sequence suits beginners well
- Cured repair resists moisture and daily wear in wet zones
Good to know
- Some color shift over months in sun-exposed areas
- Sanding cannot smooth textured repairs effectively
- Pigment vials are small and easy to tip over
5. Hupeyna Fiberglass Repair Kit

Hupeyna packs the largest volume of any kit in this guide—250 grams of paste—and includes eight separate pigment colors for color matching at the lowest cost per gram. The epoxy works on fiberglass, enamel, acrylic, porcelain, marble, and granite, making it a true multi-surface solution for households with mixed materials. The 1:1 mix ratio is consistent with other epoxy kits, and the white base formula allows for significant pigment blending before curing.
User feedback highlights a successful repair on a large ceramic floor tile that had a chunk broken out, with the owner reporting the repair was undetectable after finishing. The main trade-off is the strong hardener odor, which requires open windows and a fan during mixing and application. The pigment dye vials have sealed nipples that need piercing with a pin before use, and one user reported the first vial top flew off and spilled. A minor design annoyance, but manageable with caution.
For users tackling multiple repairs or larger damaged areas, the 250g volume means you will not run out halfway through the job. The 24-hour full cure time is standard for epoxy, and the waterproof, heat-resistant finish holds up under shower conditions. Buyers should expect a musty chemical smell during application and plan for ventilation accordingly. If you are on a tight budget and need maximum coverage, this kit delivers the best bulk value.
Why it’s great
- Largest paste volume for big repairs or multiple fixes
- Eight pigments offer wide color mixing range
- Works on fiberglass, enamel, marble, and granite
Good to know
- Strong chemical odor requires good ventilation
- Pigment vial design can cause spills during opening
- Longer cure time needed in humid conditions
FAQ
Can I use a ceramic tile repair kit on a textured floor tile?
How do I prevent the repair from looking cloudy or opaque?
Final Thoughts: The Verdict
For most users, the best ceramic tile repair kit winner is the cocomfix Color Match Kit because it balances seven pigments, low-odor epoxy, and a high-gloss finish at a price that does not penalize beginners for practice attempts. If you want instant UV-cure speed and a truly invisible finish on countertops, grab the NNRepair Quartz Kit. And for fixing loose floor tiles without demolition, nothing beats the Fix-A-Floor Original.

Mo Maruf
I created WellFizz to bridge the gap between vague wellness advice and actionable solutions. My mission is simple: to decode the research and give you practical tools you can actually use.
Beyond the data, I am a passionate traveler. I believe that stepping away from the screen to explore new environments is essential for mental clarity and physical vitality.