Whether you’re dealing with a single chipped tile in the bathroom, a loose floorboard in the living room, or an entire backsplash that feels dated, the right repair or refresh approach can restore your home’s finish without a full renovation.
I’m Mohammad Maruf — the founder and writer behind WellFizz. I’ve spent countless hours analyzing tile repair formulations, adhesive injection systems, and peel-and-stick backing technologies to understand what actually holds up under moisture, heat, and daily foot traffic.
Whether you need a color-matched filler for chips or an interlocking waterproof tile for a full wall makeover, this guide to the best ceramic tiles and repair solutions will help you match the right product to your specific project.
How To Choose The Best Ceramic Tiles and Repair Solutions
Choosing the right product depends entirely on the damage you’re fixing. A chip in a glazed bathroom wall requires a different approach than a loose floor tile that rocks underfoot or a backsplash that needs a complete aesthetic refresh. Stop treating all tile problems the same — match the solution to the specific weakness.
Match the Viscosity to the Damage Type
Thick pastes with color-matching pigments are ideal for filling chips, cracks, and scratches where you need the repair to stay put without running. Thin, self-leveling liquids excel at flowing under loose or hollow tiles because they can creep into narrow gaps that a paste would bridge across the surface. For full wall or floor resurfacing, rigid interlocking panels or peel-and-stick sheets eliminate the need for any liquid adhesive at all.
Prioritize Curing Time and Water Resistance
Repairs in wet areas — showers, tub surrounds, kitchen backsplashes — demand a formulation that cures to a waterproof seal. Most injectable adhesives need 24 hours to reach full bond strength, while repair pastes often harden within a few hours but may require additional drying before water exposure. Peel-and-stick options offer instant water resistance thanks to their PVC backing, but the adhesive must hold onto a clean, dry substrate.
Assess Your Skill Level and Tool Requirements
Color-match pastes are forgiving and require only a mixing stick and spatula. Injectable systems demand a caulking gun and a drill with a masonry bit to create injection holes. Peel-and-stick tiles require a sharp utility knife and a steady hand, while interlocking panels may call for a table saw for precise cuts. Choose a system that matches the tools you already own or are comfortable buying.
Quick Comparison
On smaller screens, swipe sideways to see the full table.
| Model | Category | Best For | Key Spec | Amazon |
|---|---|---|---|---|
| STICKGOO Peel and Stick Backsplash Tile | Peel-and-Stick | Full kitchen or bathroom backsplash refresh without grout | 20 sheets covering ~20 sq. ft. with self-adhesive PVC | Amazon |
| Palisade Interlocking Wall Tiles | Interlocking | Large wall areas like shower surrounds or accent walls | 25.6″ x 14.8″ panels covering 21 sq. ft. per carton | Amazon |
| The Original Fix-A-Floor PRO Pack | Injectable Adhesive | Rebonding loose or hollow floor tiles | 2 x 10.1 oz tubes with micro syringe injector and drill bits | Amazon |
| Tile Repair Kit by Ankita | Color-Match Paste | Fixing chips, cracks, and scratches on single tiles | Seven pigments for color matching white, beige, gray, and more | Amazon |
| Reovatile Peel and Stick Backsplash Tile | Peel-and-Stick | Renter-friendly DIY backsplash with distressed wood texture | 10 sheets at 11.34″ x 11.57″ with 3M adhesion | Amazon |
In‑Depth Reviews
1. STICKGOO 20 Sheets Peel and Stick Backsplash Tile
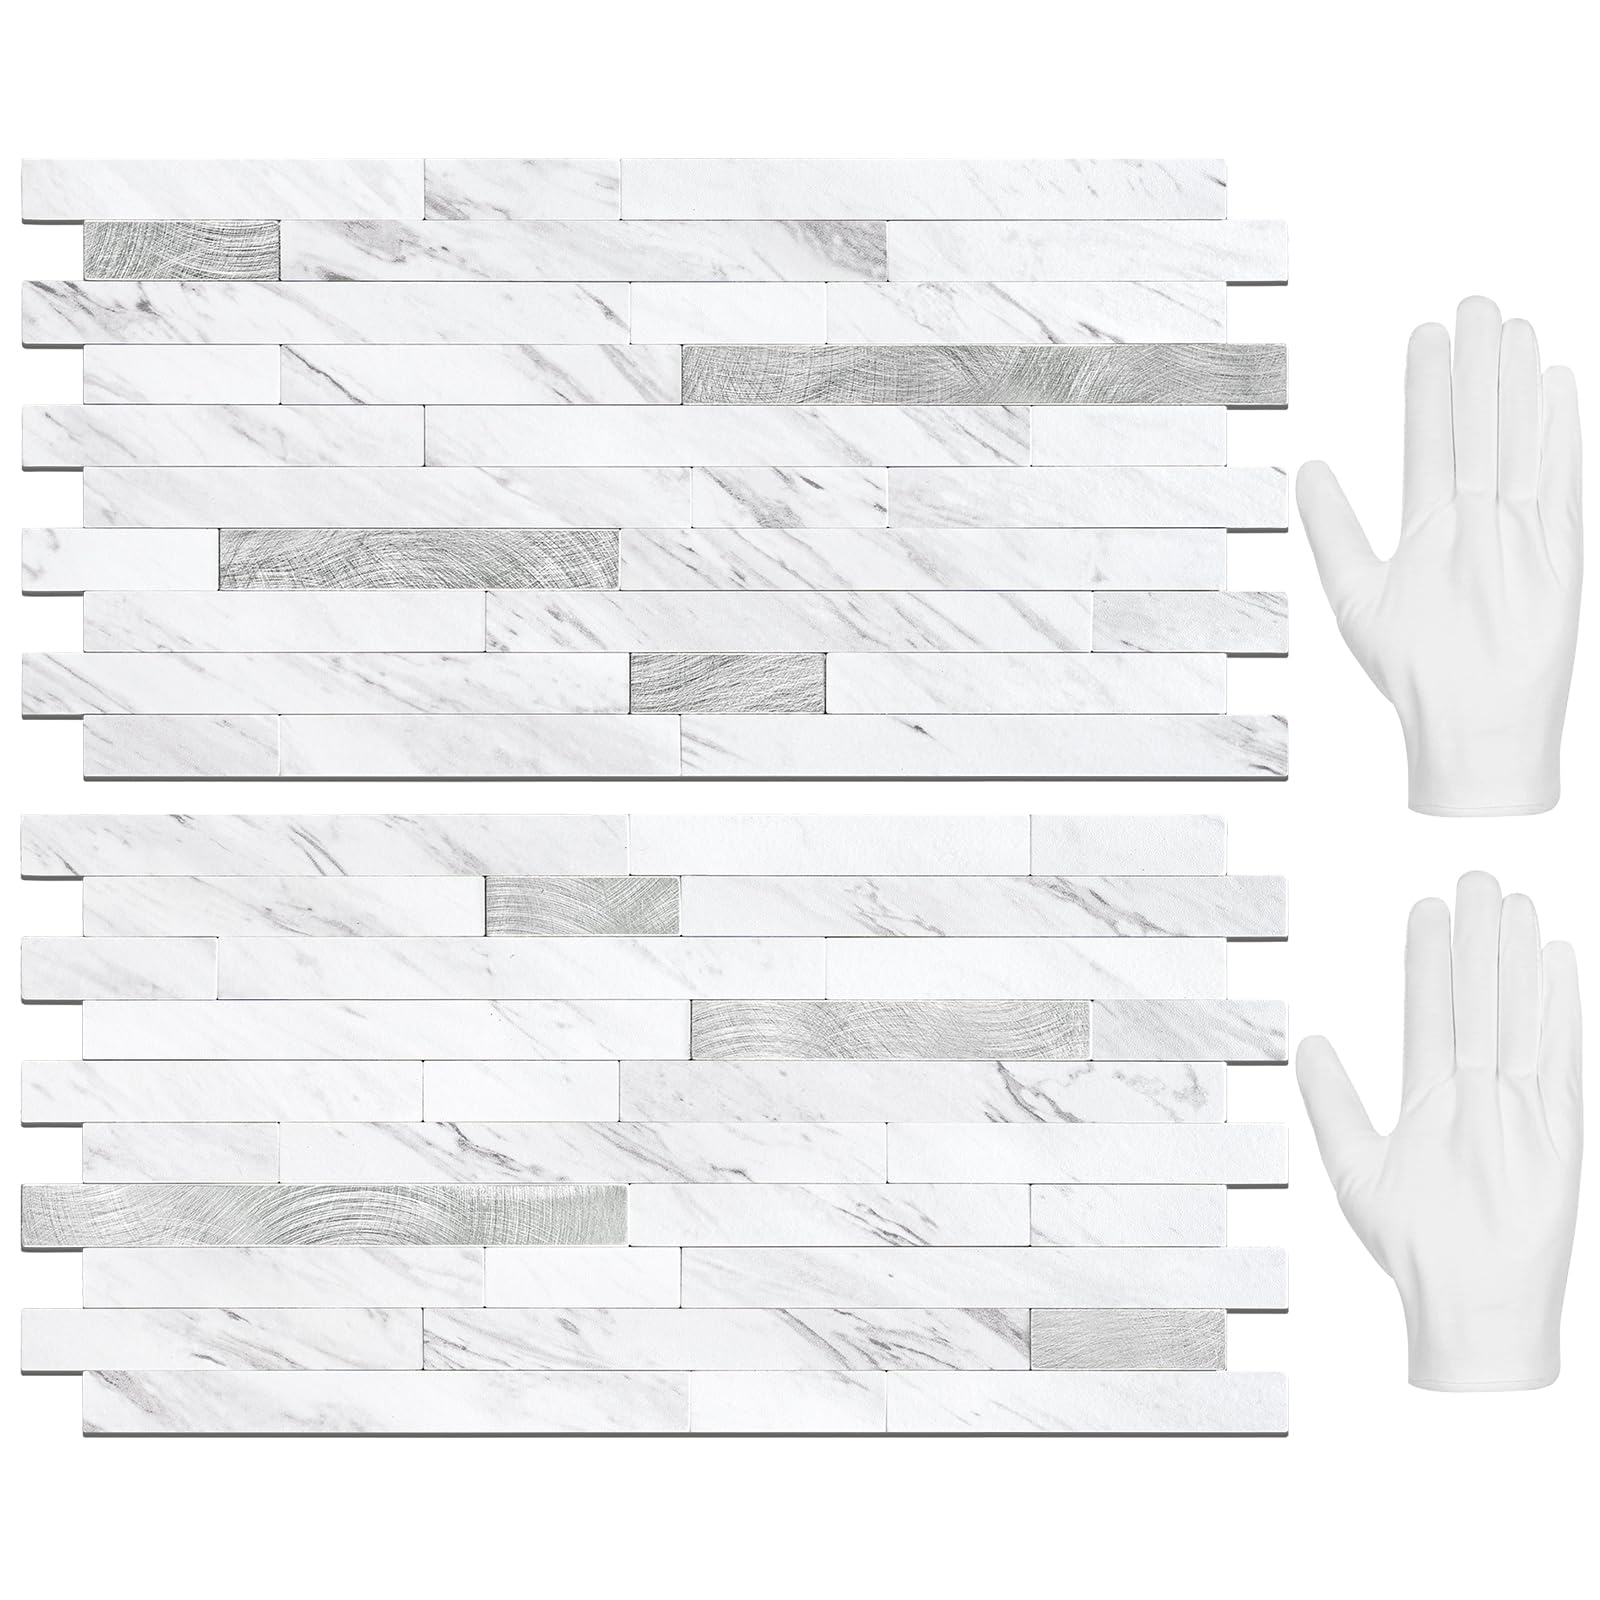
The STICKGOO delivers a genuine high-end look without the mess of mortar or the cost of stone. Each of the 20 panels measures a standard backsplash-friendly size and features a realistic marble veining pattern paired with metallic silver accents that catch light and add depth. The PVC composite laminate construction is notably heavier and thicker than basic vinyl sheets, which translates into a more convincing faux-stone texture that holds up to kitchen heat and steam.
Installation is genuinely simple — peel the backing, align the interlocking edges, and press firmly against a clean, dry wall. The adhesive is aggressive; reviewers consistently mention that it bonds immediately with minimal repositioning room, so precise placement on the first attempt matters. A utility knife with a fresh blade scores the panels cleanly, and standard outlet cutouts are straightforward with careful measuring.
Beyond aesthetics, the waterproof and heat-resistant properties make this a safe choice behind a cooktop or around a bathroom vanity. Wiping down grease splatters or toothpaste residue requires only a damp cloth, and the surface doesn’t absorb stains. For anyone wanting a dramatic kitchen or bathroom refresh over a weekend without hiring a contractor, this kit offers the best balance of visual impact and practical durability.
Why it’s great
- Thick PVC build mimics real stone texture convincingly
- Strong immediate adhesion that resists peeling over time
- Heat and waterproof construction suitable for stove and sink areas
Good to know
- Adhesive is not repositionable — requires precise first placement
- May pull paint off walls if removed, not ideal for renters without landlord approval
2. Palisade 25.6 in. x 14.8 in. Vinyl Wall Tiles in Carrara Marble

The Palisade system redefines what DIY wall tiling can look like. Each oversized panel — 25.6 inches by 14.8 inches — covers more than 2.5 square feet, dramatically reducing the number of seams and the time required to cover a shower surround or accent wall. The photo-realistic Carrara marble print carries subtle veining and color variation that repeats roughly every eight tiles, yet the placement of the repeat differs per tile, so the final installation reads as natural stone rather than identical wallpapering.
The interlocking tongue-and-groove edges lock panels together without adhesive, though adding silicone sealant in the joints delivers full waterproofing for wet zones. Reviewers report that cutting the panels on a table saw with a high-tooth-count blade yields clean edges, and a hole saw handles faucet or shower head openings. The 5 mm thickness provides enough rigidity to bridge minor wall imperfections without flexing, yet the material remains lightweight enough for a single person to lift and position.
Durability is a major strength — the PVC construction resists moisture, UV fading, and impact. In a full shower renovation, backing the walls with a waterproof membrane and sealing the interlocking edges with silicone created a system that reviewers called “stunning” and “very durable.” For anyone comfortable using basic power tools and wanting a high-end Carrara marble look without the weight, cost, or skill demands of natural stone, this is the premium choice.
Why it’s great
- Large panel size covers walls fast with fewer visible seams
- Interlocking system eliminates need for adhesive on dry walls
- Photo-realistic print offers convincing natural stone appearance
Good to know
- Requires silicone sealant in joints for full waterproofing in showers
- Cutting cleanly demands a table saw or high-quality scoring tool
3. The Original Fix-A-Floor Loose Tile Repair Adhesive PRO Pack
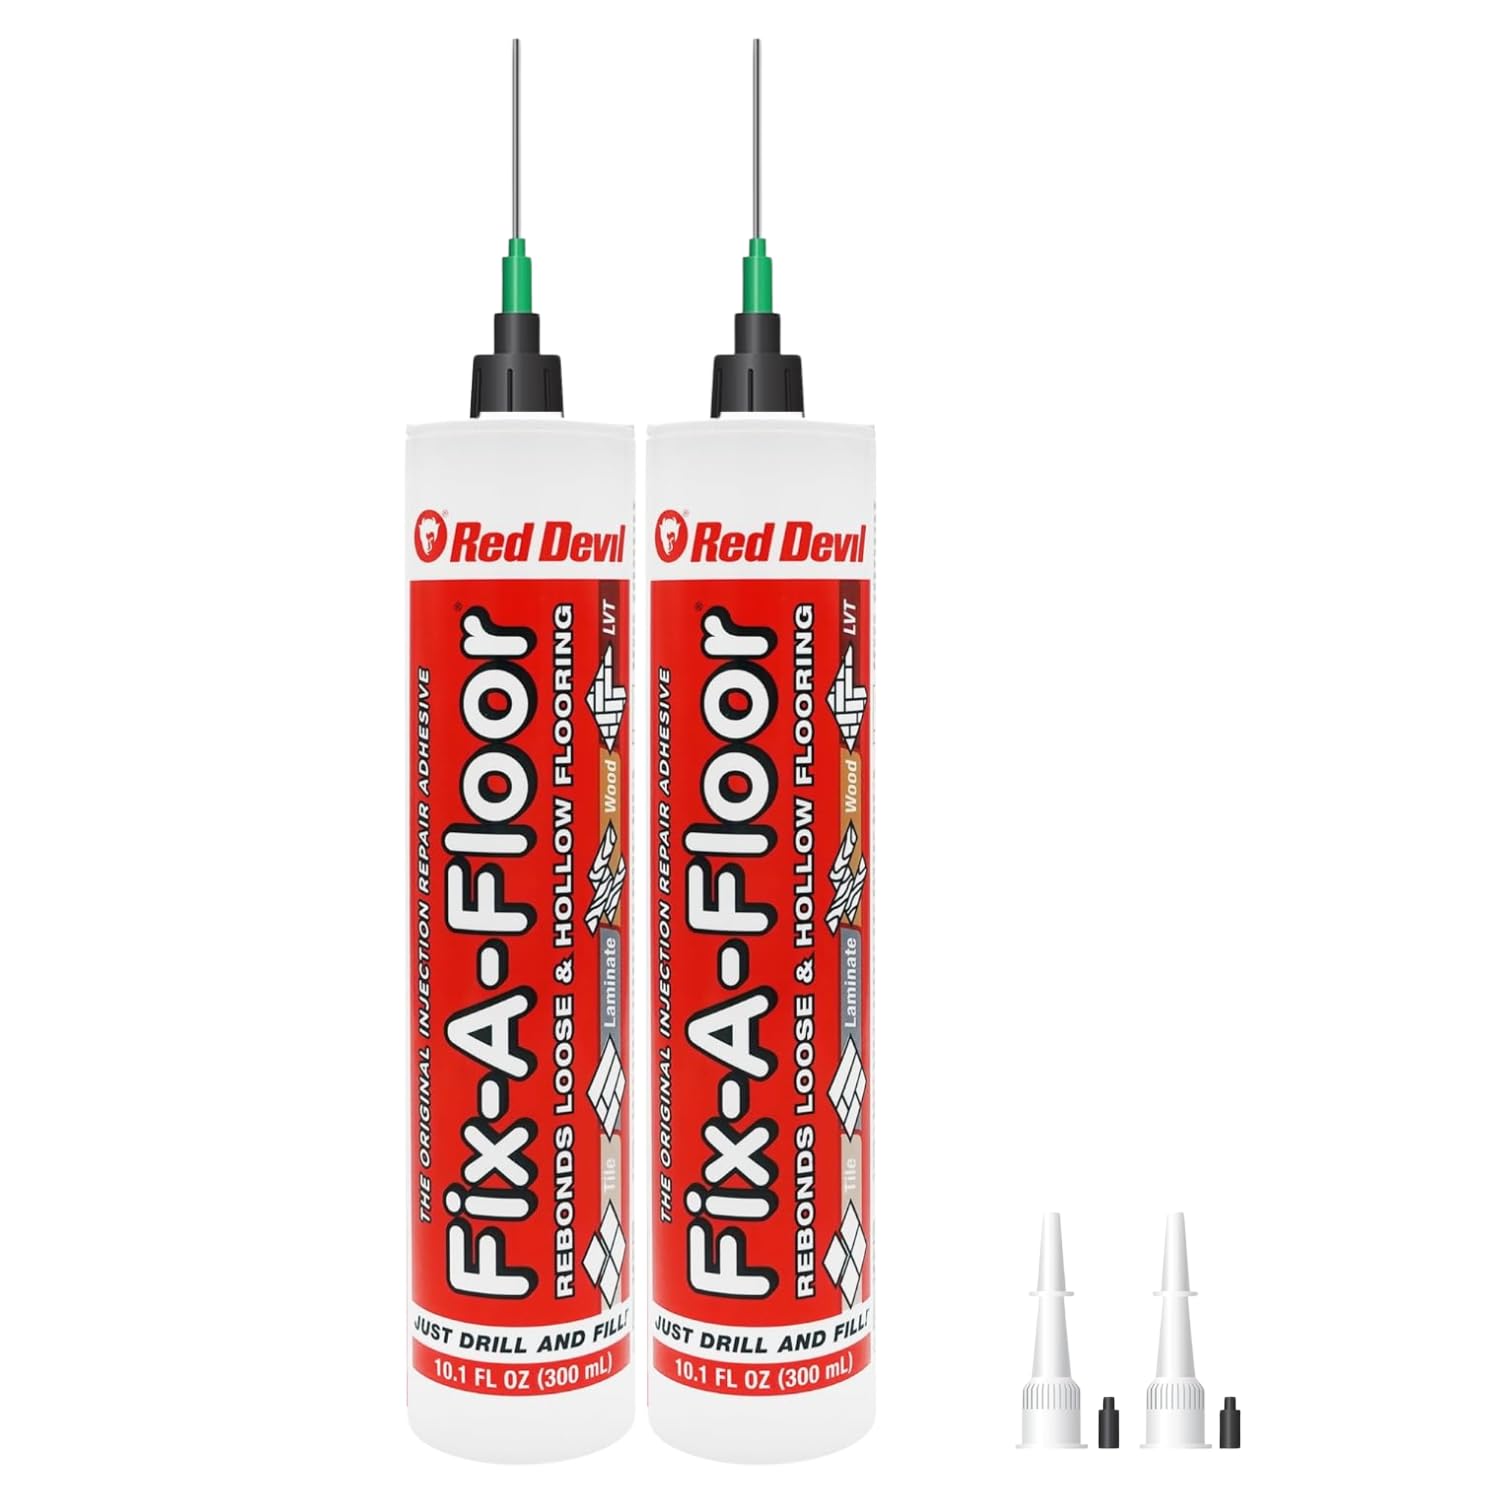
When a floor tile rocks underfoot or sounds hollow when tapped, the bond between the tile and subfloor has failed. Fix-A-Floor addresses this specific problem with a low-viscosity copolymer liquid designed to flow through small drilled holes and spread beneath the tile, rebonding it to the substrate without removing the tile. The PRO Pack includes two 10.1-ounce tubes, a micro syringe injector with a 14-gauge blunt steel needle, and two 2.5 mm diamond drill bits — everything needed for the drill-fill-repair method.
The liquid cures clear and waterproof over 24 hours, forming a permanent bond that reviewers confirm holds tiles firmly to concrete, wood, and even underfloor heating systems. Application requires a standard caulk gun (skeleton-style guns are explicitly warned against) and a drill. The included diamond bits are small and designed for drilling through grout lines; several reviewers note that upgrading to a carbide masonry bit improves performance on harder grout or porcelain tile edges.
This system is not for cosmetic chips or wall cracks — it is a structural repair for loose floor tiles. The messy nature of a low-viscosity liquid means cleanup with a damp sponge during application is essential, and overfilling holes can cause adhesive to ooze from tile edges. For homeowners facing a loose tile that would otherwise require professional removal and reinstallation, this kit saves significant money and effort, provided you’re comfortable with a drill and caulk gun.
Why it’s great
- Rebonds loose floor tiles without removal or replacement
- Self-leveling liquid flows into narrow gaps under tiles
- Cure is clear and waterproof after 24 hours
Good to know
- Application can be messy — adhesive may leak from holes or tile edges
- Included drill bits may break on hard grout; carbide bits recommended
4. Tile Repair Kit by Ankita
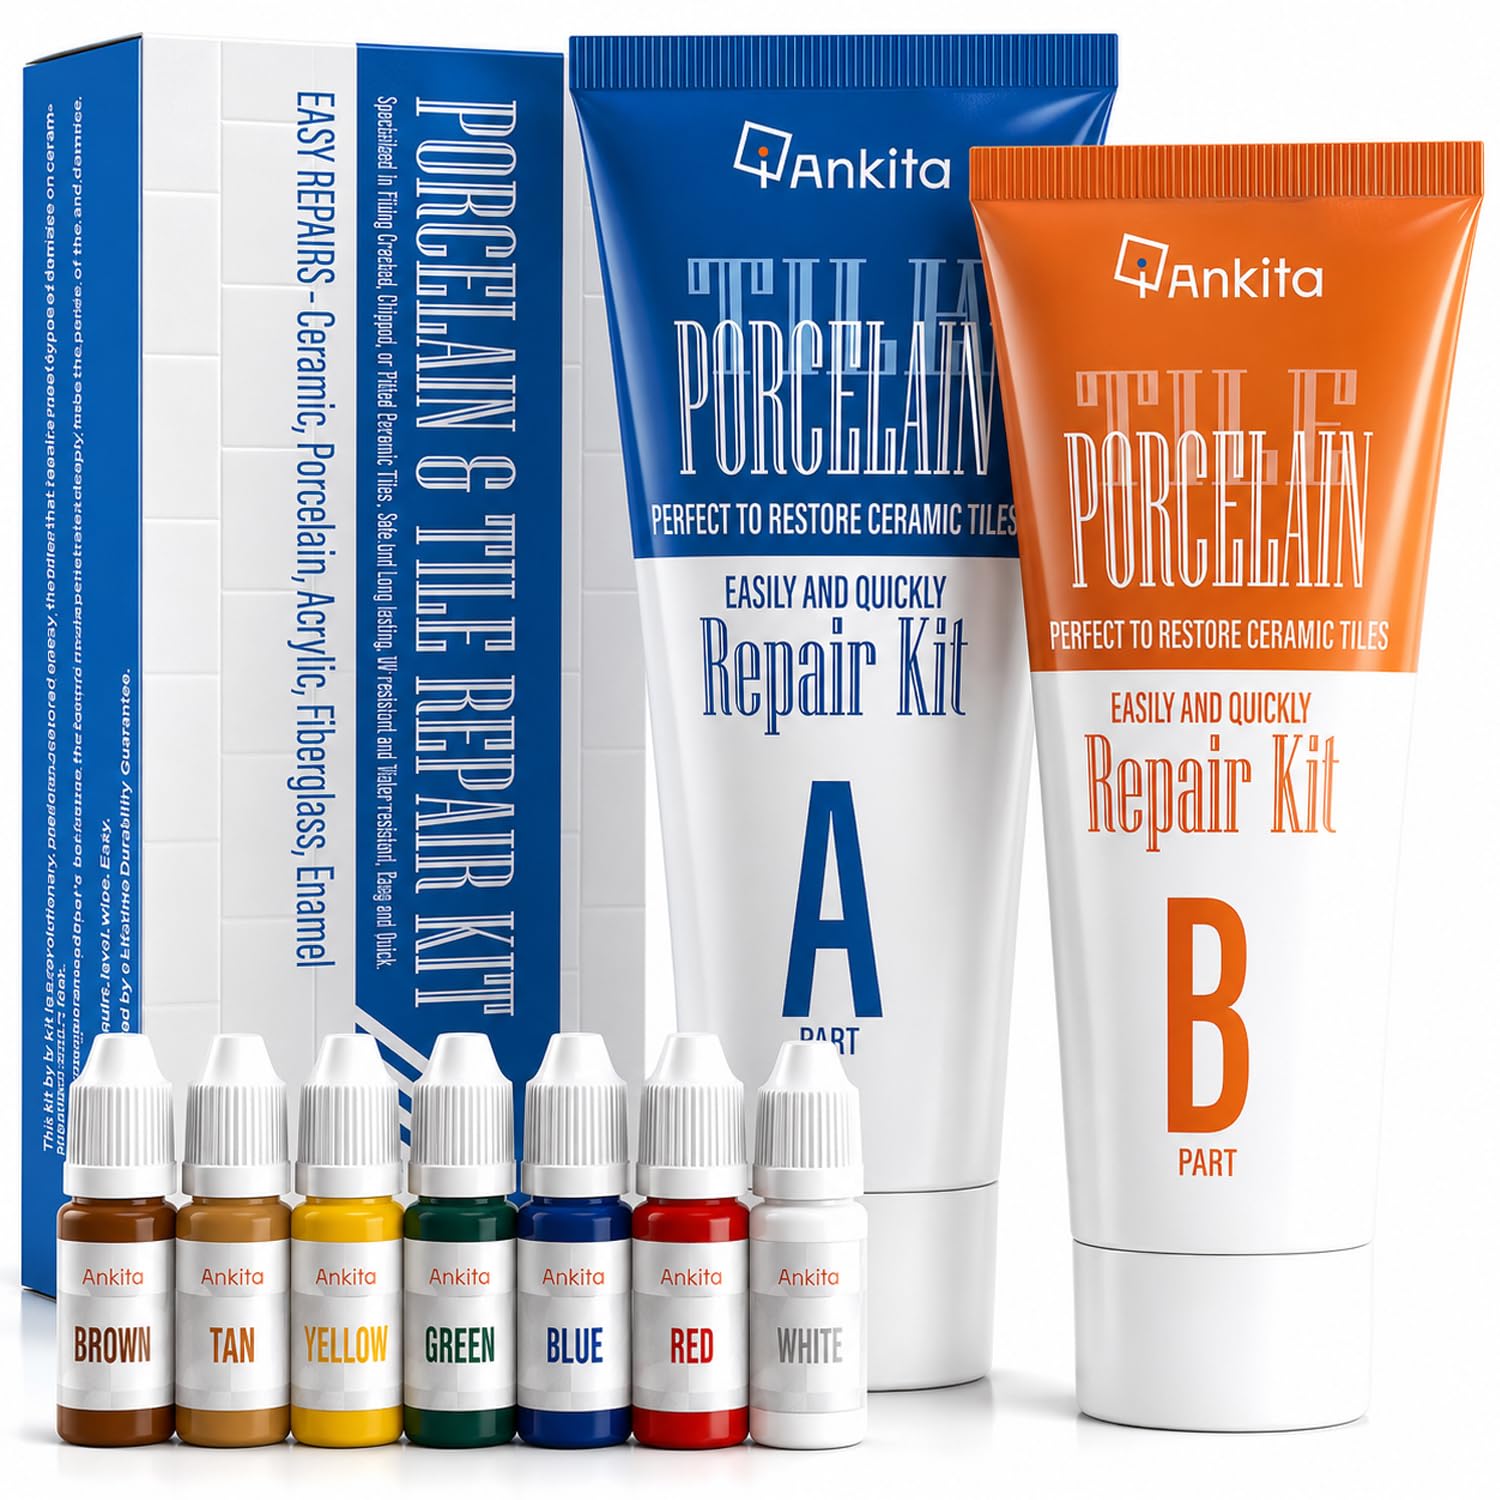
For small, localized damage — a chip in a glazed bathroom tile, a scratch across a kitchen backsplash, a hole in a porcelain sink — the Ankita repair kit offers a targeted solution that won’t require you to retile an entire wall. The kit includes a two-part epoxy paste and a set of seven pigments that let you blend a custom color match for white, beige, gray, almond, blue, black, and common ceramic tones. The paste cures to a durable, waterproof finish that resists moisture, heat, and light scratching.
Application is straightforward: mix equal parts of Part A and Part B, add pigment drop by drop until the color matches the surrounding tile, then press the paste into the damaged area with a spatula or your finger. The working time is short — the epoxy begins to set within minutes — so mixing a small batch and applying quickly yields the best results. Reviewers report that the paste bonds strongly to ceramic and porcelain, filling chips completely and leaving a smooth surface after light sanding with fine-grit paper.
The most common criticism involves color accuracy over time; some users note that the repaired area darkened or shifted tone after extended exposure to moisture. This is a minor consideration for dry areas like kitchen backsplashes, but for shower floors or tub walls where water sits, the color shift may be visible. For a budget-friendly fix that restores a single tile’s appearance without tools or professional help, this kit delivers exactly what it promises.
Why it’s great
- Seven pigments allow close color matching for common tile shades
- Cured repair is waterproof and heat-resistant
- No specialized tools required — mix, apply, sand
Good to know
- Color may shift slightly over time in areas with constant moisture
- Epoxy sets quickly, leaving limited working time for blending
5. Reovatile Peel and Stick Backsplash Tile
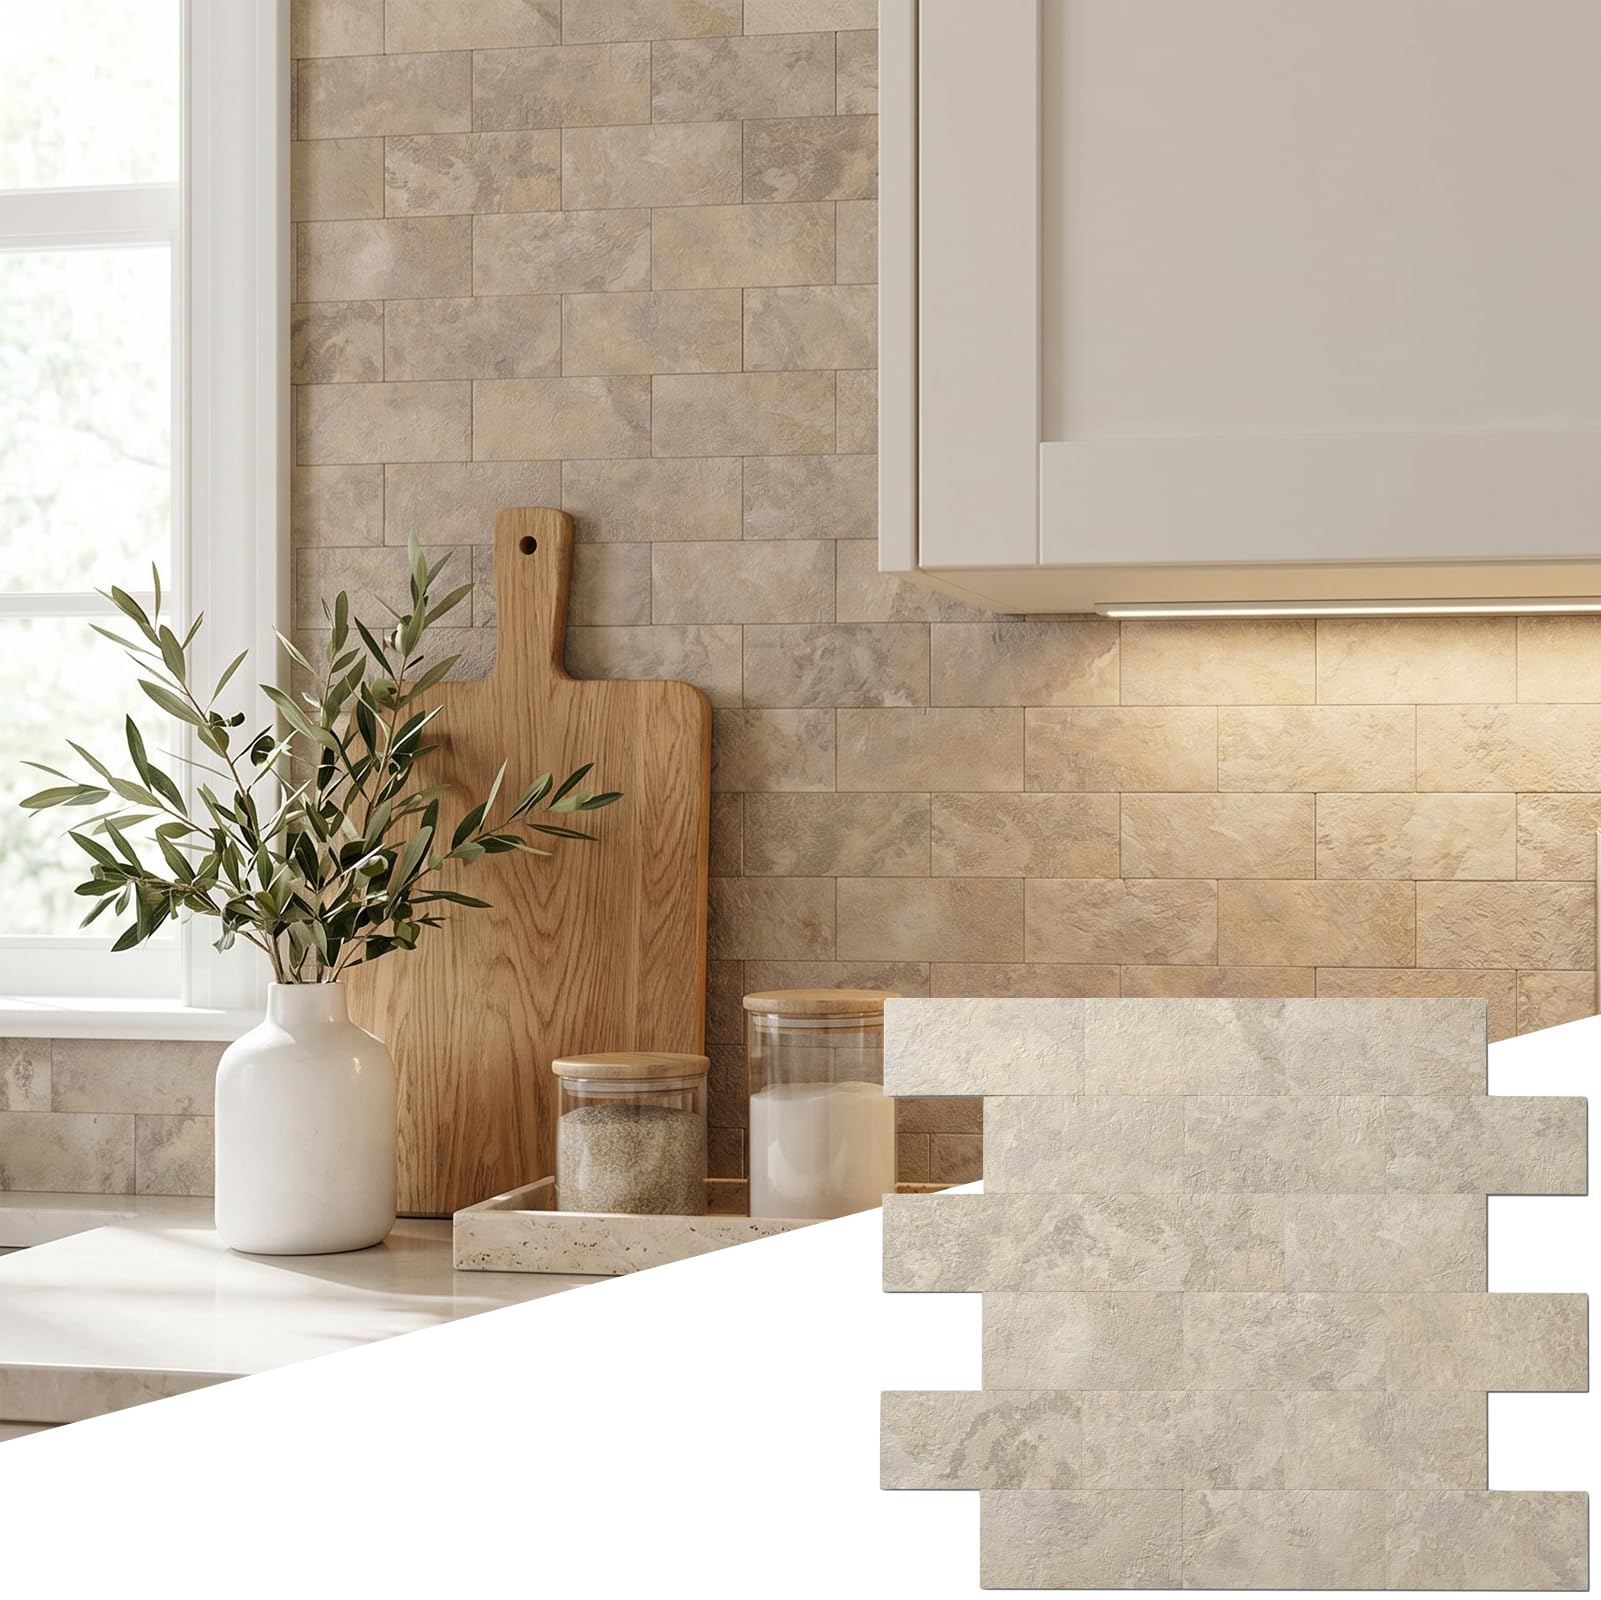
The Reovatile peel-and-stick tile targets a different aesthetic than the standard marble or subway tile — its distressed wood texture in a Beige Ecru finish brings a warm, rustic character to kitchens, laundry rooms, and fireplace surrounds. Each tile measures roughly 11.34 by 11.57 inches and is constructed from a multi-layer PVC composite that is noticeably thicker than basic 3D wallpaper or thin vinyl alternatives. The surface is scratch-resistant, waterproof, and designed to hold up to heat without warping.
Installation mirrors other peel-and-stick systems: clean the wall, peel the backing, and press into place. The 3M adhesive is exceptionally aggressive; reviewers emphasize that once the tile contacts the wall, repositioning is nearly impossible. Cutting requires a very sharp utility knife — dull blades tear the material — and cutting face-up produces cleaner edges. The backing must be removed from each individual tile rather than from a single large sheet, which slows the process slightly but prevents adhesive waste.
The style is the main differentiator here. The rich, layered wood-grain texture and matte finish create a look that stands apart from glossy stone or metal tiles. For a laundry room refresh or a fireplace accent wall where a natural, textured finish fits the room’s character, this product delivers a unique visual at a reasonable cost. Just be certain of your layout before pressing down — this adhesive does not forgive mistakes.
Why it’s great
- Unique distressed wood texture offers a warm, rustic aesthetic
- Thick PVC laminate resists scratches, heat, and moisture
- Strong 3M adhesive holds firmly on smooth and lightly textured walls
Good to know
- Adhesive is permanent — not suitable for temporary or renter installations
- Requires a very sharp utility knife for clean cuts without tearing
FAQ
Can I use a color-match repair paste for loose floor tiles?
Will peel-and-stick backsplash tiles damage my walls when removed?
How do I drill injection holes for a loose tile repair without cracking the tile?
Final Thoughts: The Verdict
For most users, the best ceramic tiles winner is the STICKGOO Peel and Stick Backsplash Tile because it delivers a premium marble-and-metal look with easy peel-and-stick installation and strong waterproof construction that holds up in kitchens and bathrooms. If you need to rebond a loose floor tile without removing it, grab the Fix-A-Floor PRO Pack. And for a full-wall Carrara marble makeover with interlocking panels that eliminate adhesive mess, nothing beats the Palisade Interlocking Wall Tiles.

Mo Maruf
I created WellFizz to bridge the gap between vague wellness advice and actionable solutions. My mission is simple: to decode the research and give you practical tools you can actually use.
Beyond the data, I am a passionate traveler. I believe that stepping away from the screen to explore new environments is essential for mental clarity and physical vitality.