Rapid nit removal comes from wet combing every day plus a lice treatment that loosens glue, then repeating the cycle in 7–10 days.
Lice eggs (nits) are the part that keeps the problem going. Adult lice can die in one round, yet eggs stuck to hair shafts can hatch later and restart it. The win is egg removal, not just killing bugs.
Below you’ll get a straight plan you can run at home today: the right comb, a sectioning routine that stops missed strands, treatment timing, and a small cleaning list that’s worth your time.
| Action | Why it works | What to watch for |
|---|---|---|
| Soak hair and add slip (conditioner or detangler) | Makes the nit comb glide close to the scalp | Dry hair hides eggs |
| Use a rigid metal nit comb | Tight teeth grab eggs and tiny nymphs | Many plastic combs flex |
| Comb in small sections (1–2 cm) | Keeps your place and limits misses | Clip finished hair away |
| Wipe the comb after each pass | Stops re-depositing eggs onto clean hair | Use a white towel to see debris |
| Wet comb daily for 7 days | Removes eggs you missed and catches hatchlings | Short sessions beat one marathon |
| Repeat treatment on day 7–10 | Kills lice that hatched after day 0 | Follow label timing |
| Wash or bag head-touch items only | Lice stay near heads and die without a host | Skip room sprays |
| Check close contacts | Stops a back-and-forth cycle at home | Treat only with live lice found |
How To Remove Lice Eggs Quickly for stubborn nits
The fastest results come from pairing two moves: a treatment that targets live lice, and hands-on egg removal with a nit comb. One without the other often drags the job out.
Set up one repeatable time block. Most households do well with 20–40 minutes per head. Bright light helps, and a chair with a backrest saves your shoulders.
Tools that pay off right away
- Metal nit comb: Rigid teeth with tight spacing.
- Hair clips: Four to six clips for sectioning.
- Conditioner or detangler: Enough slip to prevent snagging.
- Paper towels: Wipe and inspect after each pass.
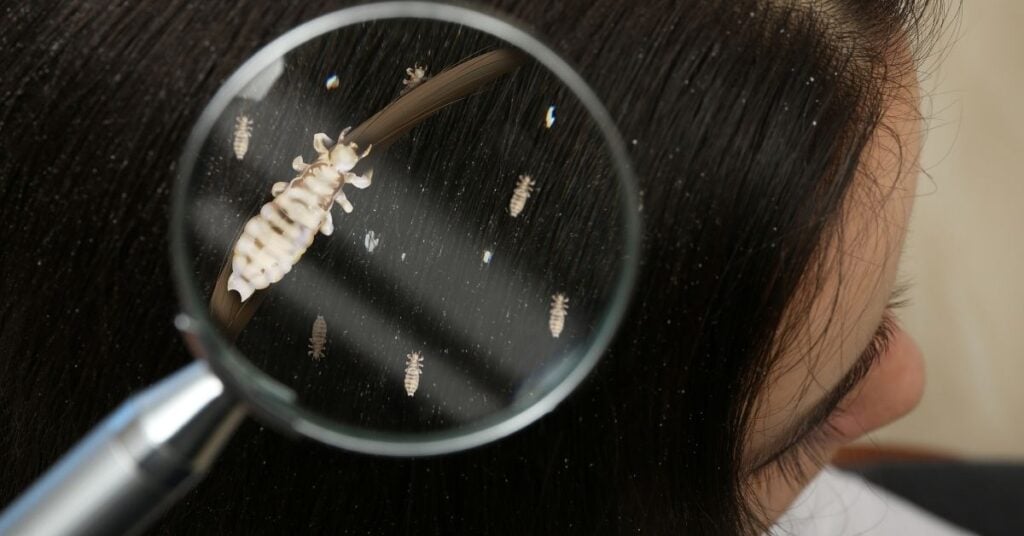
How to spot a nit
Nits are glued to the hair shaft, often within a few millimeters of the scalp. Dandruff slides when you pinch and move it. Nits don’t. They feel like a tiny bead stuck in place.
Color varies with hair color and lighting. When you’re unsure, comb and check what lands on the towel.
Wet combing steps that clear eggs fast
Wet combing is the workhorse. Done well, it strips eggs and catches hatchlings before they mature. Here’s a routine you can repeat.
1) Set up and keep hair damp
Put a towel over the shoulders. Keep the comb, clips, and paper towels within reach. If hair dries while you work, mist it with water so the comb stays close to the roots.
2) Add slip, then detangle once
Work conditioner or detangler from roots to ends. Detangle with a regular brush first. This prevents snagging that makes people start skipping sections.
3) Section the head into zones
Split the hair into left, right, crown, and nape. Clip three zones up. Start at the nape or behind the ears, since those areas often hold more eggs.
4) Comb in tiny slices from scalp to ends
Take a thin slice of hair, no wider than the comb. Place the comb teeth flat against the scalp and pull slowly to the ends. Keep steady pressure so the teeth stay close to the roots where eggs sit.
After each pass, wipe the comb on a paper towel. If you see eggs, keep combing that slice until two full passes come out clean, then clip it away.
5) Rinse and do one last pass
Rinse out the conditioner. Towel-dry until damp. Run the nit comb through again to catch eggs that shifted during rinsing.
Treatment choices and safe timing
Many over-the-counter lice products target live lice, not eggs. Some newer options work by coating lice and drying them out. The label matters more than the brand name, since timing is what stops re-hatching.
Use products labeled for head lice and follow directions. Don’t mix products, don’t repeat early, and don’t leave them on longer than stated. If you want a clear overview of what’s recommended in the U.S., the CDC head lice guidance lays out diagnosis and treatment choices in plain language.
When to seek clinical care
If you still find live lice after two correctly timed treatment rounds plus daily combing, get medical advice. A prescription option may be needed with resistant lice, and a clinician can check for scalp infection or irritation.
What not to put on the scalp
Skip home mixes like gasoline, kerosene, or undiluted essential oils. They can burn skin and trigger breathing trouble. Also skip bug bombs and room sprays. Lice need a human host and don’t last long away from the scalp.
Home cleaning that’s worth your time
You don’t need to scrub the whole house. Stick to items that touched the head in the last two days.
Wash and dry high-contact fabrics
Wash pillowcases, sheets, hats, hoodies, scarves, and hair towels used in the last 48 hours. Dry on high heat if the fabric allows.
Bag what you can’t wash
Delicate items can go in a sealed plastic bag for two weeks so stray lice die without a host.
Clean combs and brushes
Soak combs and brushes in hot water for 5–10 minutes, then scrub them clean. Clean the nit comb between heads.
Timing that matches the lice life cycle
Eggs hatch on a schedule, so a calendar beats guesswork. Use this timeline, then adjust only if your product label says a different interval.
| Day | What to do | Goal |
|---|---|---|
| Day 0 | Treat per label + full wet comb | Knock down live lice and strip as many eggs as possible |
| Days 1–6 | Wet comb daily (20–40 minutes) | Remove missed eggs and catch hatchlings early |
| Day 7–10 | Second treatment per label + full wet comb | Kill lice that hatched after day 0 |
| Days 11–14 | Comb every other day | Confirm the scalp stays clear |
| Day 15+ | Weekly checks for two weeks | Catch a new exposure early |
Places eggs hide and how to catch them
Nits cluster in a few spots. If you only comb the top layer, you’ll keep spotting eggs later.
Behind the ears and at the nape
Tilt the head forward and comb upward from the nape. Then comb down from the crown into the nape so you hit the roots from two angles.
Part lines
Create a new part every few centimeters and comb along it. A rat-tail comb helps make neat lines.
Long, thick, or curly hair
Thick hair needs smaller sections. Curly hair needs more slip and slower passes. If hair tangles, finger-detangle first, then return to the nit comb.
When kids hate the comb
If someone’s squirmy, you can still finish the job. Short sessions work well: 10 minutes now, 10 minutes later, then a final round after a show. Daily consistency beats one long, miserable session that never repeats.
These comfort moves can help:
- Let them hold a mirror.
- Use extra conditioner and slow down near the ears.
- Take a short break every few minutes.
- Use a timer and stop when it dings.
Checks that show progress
Itching can linger after lice are gone, so don’t use itching as your scorecard. Use what you find at the roots and what lands on the towel.
- No live lice seen during a careful 5-minute scalp check
- No new eggs close to the scalp after day 7
- Only empty egg shells found farther down the hair
If you keep finding eggs right at the roots after several days of careful combing, shrink your section size and slow your passes. For a clinic-style overview of diagnosis and treatment, MedlinePlus explains head lice and nits in plain language.
Mistakes that keep eggs sticking around
Most “it came back” cases are missed eggs, not a new infestation. These missteps show up in many homes.
- Sections too big: If the comb isn’t touching the scalp on every strand, eggs stay put.
- Combing on dry hair: Dry hair lifts away from the comb and hides eggs near the roots.
- Not wiping the comb: Debris on the teeth can drop back into clean hair.
- Skipping the day 7–10 repeat: Hatchlings can mature and lay new eggs fast.
- Treating everyone “just in case”: Extra treatments irritate skin and don’t stop a missed comb pass.
If you fix only one thing, fix section size. When each slice is thin, you can see roots and feel the comb catch. That’s when daily sessions start shrinking the pile on the paper towel.
A checklist for your next comb session
Save this list and run it each time. It keeps sessions steady when you’re tired.
- Light on, towel on shoulders, paper towels ready.
- Hair damp, conditioner worked through.
- Four zones clipped; start at nape or behind ears.
- Take 1–2 cm slices; comb from scalp to ends with steady pressure.
- Wipe comb after every pass; fold to a clean spot.
- Clip finished hair away; move in rows.
- Rinse, then do one final full-head comb pass.
- Write down the day so the day 7–10 repeat doesn’t slip.
To keep your plan consistent, say it out loud: how to remove lice eggs quickly means daily combing plus a timed repeat, not a single “big day.” If you’re treating more than one person, run the same checklist per head, and clean the comb between people.
If you’re still unsure where the eggs are coming from, do one slow check in bright light and confirm the shape and position. Once you’ve seen real nits a few times, your eyes get trained, and the whole job gets easier. When you stick with the calendar, how to remove lice eggs quickly stops being a panic question and turns into a routine you can finish.
References & Sources
- Centers for Disease Control and Prevention (CDC).“Head Lice.”General facts on head lice, diagnosis, and treatment choices.
- MedlinePlus (U.S. National Library of Medicine).“Head Lice.”Overview of nits, symptoms, and common treatment steps.

Mo Maruf
I created WellFizz to bridge the gap between vague wellness advice and actionable solutions. My mission is simple: to decode the research and give you practical tools you can actually use.
Beyond the data, I am a passionate traveler. I believe that stepping away from the screen to explore new environments is essential for mental clarity and physical vitality.