Clear aligners start with an in-person dental exam and 3D scan, then you wear a series of trays each day until your teeth match the plan.
If you searched for how to get invisaline, you want the real sequence: what happens at the office, what happens at home, and what can trip you up. You also want to know if you’re a good candidate before you spend time booking visits.
| Stage | What You Do | What Happens Next |
|---|---|---|
| Provider pick | Choose a dentist or orthodontist who treats cases like yours | You book an exam and records visit |
| Oral health check | Get a dental exam, cleaning plan if needed, and gum check | Healthy teeth and gums make tooth movement safer |
| Records day | Photos, X-rays, bite notes, and a digital scan | Your scan becomes the start point for a tooth-movement plan |
| Plan review | Review the projected tooth steps and timing | You approve the plan and schedule delivery |
| Pickup visit | Try trays, learn wear rules, get attachments if needed | You leave with trays and a change schedule |
| Home routine | Wear trays most of the day, clean them, track changes | Teeth shift a little with each set |
| Check-ins | Return for fit checks and bite checks | Your provider tweaks the plan when needed |
| Refinements | Get a new scan near the end if small moves remain | Extra trays finish the last details |
| Retention | Wear retainers after trays | Your result holds long term |
How To Get Invisaline in real life
The shortest version is simple: an exam, a scan, a plan, then daily wear. The longer version helps you spot bad fit and keep progress steady.
Step 1: Pick the right provider
You’ll see two common routes: an orthodontist who does tooth movement all day, or a general dentist who offers clear aligners as one service. Both can do solid work when the case and experience match.
Start with a short list of offices near your home or job. Then check credentials, training, and how often they treat aligner cases. If you want a straight overview of what aligners treat, the AAO clear aligners overview gives a plain-language summary of common bite and spacing problems.
Questions to bring to the first visit
- How many aligner cases like mine do you finish each month?
- Will I see the same clinician at each check-in?
- Do you plan to use attachments, elastics, or bite ramps?
- How often do you rescan or order refinements?
- What happens if I lose a tray or crack one?
Step 2: Make sure your mouth is ready
Aligners move teeth through bone and gum tissue. That movement goes smoother when cavities, gum irritation, and lingering inflammation are handled first. If your provider spots a cavity or gum bleeding, treat that before you order trays.
Step 3: Get records and a 3D scan
Records day is where the plan is born. You’ll get photos, X-rays, bite notes, and a digital scan or impression. The scan becomes the digital model that guides each tray.
Step 4: Review the plan and the quote
Your provider will show a projected end result and a rough schedule. Some offices show a step-by-step animation of tooth movement. This is where you ask about timing, attachments, and bite goals.
Fees vary by case and region. Your written quote should spell out what’s included: records, trays, refinements, check-ins, and retainers. If retainers are not included, ask what they cost so you can budget now instead of being surprised later.
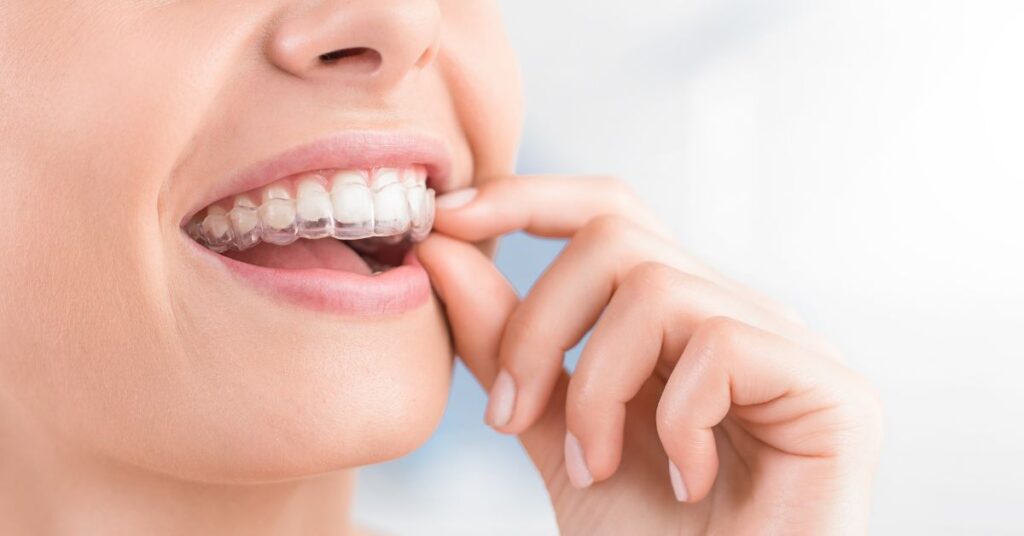
Step 5: Pickup day and your first trays
At pickup, you’ll try on the first set. Your provider checks fit, sets your tray change schedule, and may place small tooth-colored attachments. Attachments help the tray grip and push in specific directions.
Most plans call for wearing trays 20–22 hours a day, taking them out only for meals and cleaning. Invisalign explains the general treatment flow on its official Invisalign treatment steps page, which lines up with what most offices teach at pickup.
Step 6: Build a routine that actually sticks
The biggest driver of progress is wear time. A tray can’t move teeth if it’s on a napkin next to your lunch. Set your own rules early and you’ll spend less time forcing tight trays later.
Try this daily pattern:
- Morning: rinse trays, brush, pop trays back in before coffee.
- Lunch: remove trays, eat, brush or rinse well, then reinsert.
- Night: brush and floss, clean trays, then wear them through sleep.
Step 7: Check-ins and tray changes
Most people swap to a new set every week or two. Your schedule comes from your provider, not a random forum post. A check-in visit lets the clinician see if teeth are tracking with the trays and if your bite is staying stable.
Getting Invisaline from a local orthodontist
Some people start with a dentist and still end up with an orthodontist when the bite needs more hands-on care. That’s normal. Tooth movement can be simple in one person and tricky in another, even when the teeth look similar at first glance.
Red flags that call for an extra opinion
- Jaw clicking or pain when you open wide
- Front teeth that don’t touch when you bite
- Back teeth that hit first and rock your bite
- Teeth that look straight but chewing feels uneven
What to expect if attachments or elastics are planned
Attachments can look like small bumps on the tooth. Elastics hook to small cutouts or buttons and help guide the bite. Both can feel odd at first, then fade into the background as you get used to them.
How long it takes
Timelines vary. Mild spacing or crowding may finish in months, while bigger bite changes take longer. Your provider can give a range after records day, then refine it once your case is approved and trays are ordered.
Staying on track without wasting time
Most delays come from small daily slip-ups. You miss hours here and there, then trays feel tight, then you pause changes, then your finish date drifts. It’s not a moral failing. It’s just math.
| Snag | What It Means | What To Do |
|---|---|---|
| Tray feels too tight | Wear time was low or a tooth is lagging | Increase wear, use chewies, call your office if pain spikes |
| Gap at the tray edge | One tooth isn’t seating fully | Seat the tray with gentle pressure; ask about attachments |
| Sharp edge rubbing | Plastic edge hits gum tissue | Use a nail file to smooth the edge, then mention it at check-in |
| Bad smell | Bacteria built up on trays | Brush trays with mild soap; avoid hot water |
| Staining | Trays met coffee, tea, or soda | Drink colored drinks with trays out, then rinse and brush |
| Lost tray | You’re missing the active step | Wear the previous tray or move to the next only if your office says so |
| Speech feels odd | Tongue adapts to new shape | Read out loud for a few minutes a day |
| Bite feels different | Teeth are moving and contacts shift | Note when it started and tell your provider at once |
Cleaning trays the simple way
Rinse trays when you remove them so saliva doesn’t dry into film. Brush them with a soft toothbrush and mild soap. Skip boiling water or harsh cleaners that can warp plastic or leave a taste.
Brush and floss before trays go back in. Food trapped under a tray is a fast route to decay, and it can make the tray smell even if it looks clear.
Eating and drinking rules that keep trays clear
Water is fine with trays in. Most other drinks are better with trays out, since sugar and acid can sit against enamel. If you do drink anything colored, rinse well before trays go back in.
Travel and workday tips
Keep a case with you. Trays tossed into a tissue end up in the trash. Add a travel toothbrush, floss picks, and a small bottle of water.
When to call the office right away
- A tray cracks and won’t stay seated
- New pain that doesn’t ease after a day or two
- A bite change that makes chewing hard
- Bleeding gums that keep returning
What you pay for and what you can ask to see
Clear aligner fees are built from planning time, the number of trays, and the office time needed to keep your bite on track. That’s why two people with similar looking teeth can get different quotes.
Insurance and payment plans
Some dental plans include orthodontic benefits. Some do not. Your office can submit a pre-treatment estimate so you know what the plan may reimburse. If you have an HSA or FSA, ask if you can use it for aligner fees.
Retainers after trays
Teeth want to drift back toward old positions. Retainers are the part that holds your result. Many people wear them full-time at first, then shift to nights as directed by their provider.
Ask what style you’ll get, how long it lasts, and what replacement costs. Losing a retainer can undo months of work if you wait too long to replace it.
Next actions you can take this week
Start with two calls: one to a nearby office for an exam slot, and one to your insurance carrier to ask about orthodontic benefits. Then set yourself up for success before trays arrive.
- Book a cleaning if you’re due
- Buy a second aligner case for your car or bag
- Pick a tray-change day that fits your schedule
- Plan meal times so wear hours stay high
- Take a starting photo so you can spot changes
When you’re ready to begin, bring this page to your first visit and ask your top questions. That’s the calmest way to start how to get invisaline and finish with a bite that feels good, not only a smile that looks straighter.
References & Sources
- American Association of Orthodontists (AAO).“Clear Aligners.”Defines what clear aligners can treat and why professional planning matters.
- Invisalign.“How Does the Invisalign Treatment Work?”Outlines the standard scan-to-aligners process used by Invisalign providers.

Mo Maruf
I created WellFizz to bridge the gap between vague wellness advice and actionable solutions. My mission is simple: to decode the research and give you practical tools you can actually use.
Beyond the data, I am a passionate traveler. I believe that stepping away from the screen to explore new environments is essential for mental clarity and physical vitality.