Front-thinning is easiest to disguise when you lift roots at the hairline, soften the part, and blur scalp show-through with a light, matte tint.
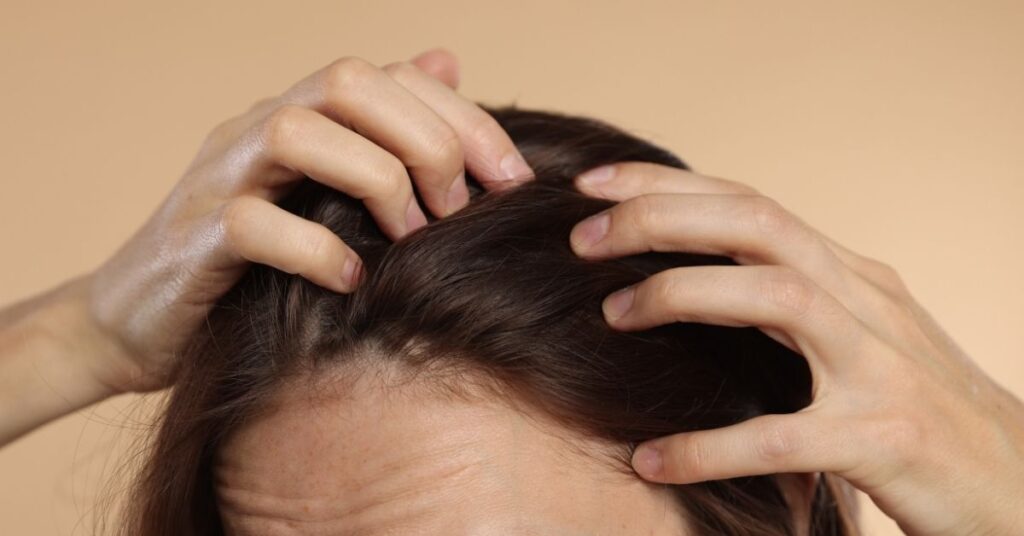
Thinning at the front can feel tricky because there’s less hair to “borrow” for coverage. A straight part, flat roots, or shiny product can make the hairline look more see-through than it really is.
Below you’ll get practical styling moves you can do at home, plus product choices and haircut ideas that read natural in daylight. Mix and match based on your hair type and how much time you’ve got.
If you’re new to powders or sprays, start lighter than you think and build. In bright light, over-dark roots can read like marker. A light layer still cuts contrast and lets the texture of real hair show through.
| Cover Method | Works Best When | What Makes It Look Natural |
|---|---|---|
| Soft side part | One temple looks thinner | Move the part a little, not inches, then loosen with fingertips. |
| Short zigzag part | Your part line shows scalp | Only zigzag the first 2–3 inches, then mess it up slightly. |
| Root lift blow-dry | Fine hair lies flat | Dry the front up and back, then finish with cool air. |
| Velcro roller at the front | You can spare 5–10 minutes | Roll away from your face and remove only when cool. |
| Matte root powder | Scalp contrast is the main issue | Tap color into the scalp in thin layers, not one heavy pass. |
| Keratin fibers | There’s some hair for fibers to cling to | Apply last, then set with a light mist so it doesn’t drift. |
| Textured fringe | The hairline looks uneven | Keep it airy so it overlaps instead of splitting. |
| Clip-in fringe or small topper | You want instant, reliable coverage | Match root color first, then trim while it’s on your head. |
Why The Front Shows Scalp First
The front has shorter hairs, baby hairs, and more wear from heat tools and tight styles. When those hairs bend or break, the scalp peeks through sooner than it would at the back.
Front thinning is usually more about contrast and spacing than “missing hair.” That’s good news, because spacing can be disguised with shape, lift, and a little color blending.
How To Cover Up Thinning Hair In Front With Part And Lift Moves
If you’re trying to figure out how to cover up thinning hair in front, start with the part. A sharp line is like a spotlight on scalp. A soft line breaks it up.
Make A Short Zigzag At The Hairline
With dry hair, use the pointed end of a comb and draw a shallow zigzag from the hairline back two to three inches. Stop there. Then rake your fingertips over the top so it looks casual.
If your hair slides back into a straight line, add a pinch of dry texture spray at the roots and scrunch once.
Shift To A Gentle Side Part
A deep side part can send more hair across a thinner temple, but big changes can look odd for a few days. Try moving your part one finger-width at a time. Your roots adjust faster than you’d expect.
Keep the front inch slightly swept to one side even if you keep a center part behind it. That small sweep hides the opening right at the hairline.
Blow-Dry The Front First
Lift buys you coverage. Start with damp hair. Work a small amount of volumizing mousse or root spray into the first two inches near the hairline, then comb it through so it doesn’t clump.
Dry the front before the rest of your hair. Use a small round brush and pull sections straight up from the roots. When nearly dry, brush the section up and back. Finish with cool air for ten seconds per section.
Cover Up Thinning Hair In The Front With Powders And Fibers
Once the hair is sitting where you want it, you can blur what’s left. The trick is matte finish and light layers. Shine makes scalp pop.
Use Matte Root Powder Like A Stamp
Pick a shade that matches your roots, not your ends. Load a small angled brush, tap off the extra, then press color into the scalp where it shows. Work in thin layers and step back between layers.
If you go too dark, soften it with a clean spoolie or a fluffy brush. That keeps the edge from looking drawn on.
Apply Fibers After Styling, Not Before
Fibers cling to hair. If you sprinkle them on first, they stick to damp strands and slide. Style and lift first, then add fibers lightly behind the hairline and near the temples.
Pat once with fingertips, then use a light mist of hairspray from arm’s length. Heavy spray can turn fibers into gritty dots.
Use Dry Shampoo For Grip
A touch of dry shampoo at the front can stop roots from separating into skinny strings. Spray from a distance, wait a minute, then massage at the roots with your fingertips.
Try Root Spray For Quick Shade Match
A tinted root spray can be handy when your scalp shows along the part or when gray roots make the front look patchy. Spray lightly at the roots, then wait until it dries fully before touching. Wet spray can transfer to fingers, pillowcases, and hat brims.
Keep the nozzle 6–8 inches away and use short bursts. Then comb the surface layer once so the color sits under the top hairs, not on them. Finish with a soft, matte product so the front doesn’t turn shiny under overhead lights.
Haircuts That Frame The Hairline
A smart haircut makes covering easier because it builds overlap into the shape. Ask your stylist to keep weight off the front so it lifts instead of droops.
Pick Airy Fringe Over Blunt Bangs
Light, textured fringe can mask a thinner hairline while still showing your face. Pieces that vary in length are less likely to split down the middle. A blunt, heavy bang can open up and reveal scalp.
Add Short Face-Framing Layers
If you wear your hair medium or long, shorter layers around the face can make the front look fuller in motion. Longer, heavier front pieces tend to pull down and separate.
Extra Coverage Options For Busy Days
Some days the front won’t cooperate. Sweat, humidity, or a long travel day can flatten lift and spread the part. A simple add-on can save time.
Clip-In Fringe And Small Toppers
A clip-in fringe covers the hairline fast without a haircut. Root match matters most. Once it’s clipped in, curl or wave your hair and the piece together so they blend.
A small topper can cover thinning along the part and just behind the hairline. Place it slightly behind the edge so your natural baby hairs soften the front.
Headbands, Scarves, And Hats That Look Styled
A wide headband or scarf can hide a sparse hairline in seconds. Leave a bit of hair out at the sides so it reads intentional. For hats, tuck hair behind one ear and let the other side fall forward to keep balance.
When A Medical Check Makes Sense
Front thinning can come from styling stress, genetics, or medical conditions. If you notice sudden shedding, patchy loss, redness, scaling, or pain, seeing a board-certified dermatologist is a smart move.
The AAD hair loss diagnosis and treatment overview explains how doctors sort causes and match care options. The NIAMS page on alopecia areata describes patchy hair loss patterns and common treatment paths.
Even if your daily plan is styling-based, knowing what’s driving changes can steer you toward gentler choices.
Fast Routine That Holds Up In Real Light
This order keeps you from re-doing steps. It also prevents powders and fibers from getting trapped under flat hair.
| Order | Do This | Avoid This |
|---|---|---|
| 1 | Set a soft part for the first 2–3 inches | Drawing a ruler-straight line at the hairline |
| 2 | Lift roots at the front with blow-dry or a roller | Piling on mousse until strands stick together |
| 3 | Add a touch of dry shampoo for grip | Spraying too close and leaving a pale patch |
| 4 | Tap matte powder where scalp shows | Swiping color like makeup and smearing it |
| 5 | Sprinkle fibers only where hair exists to catch them | Dumping fibers onto bare scalp so it looks dusty |
| 6 | Set with a light mist of flexible hairspray | Using glossy, strong-hold spray near the hairline |
| 7 | Check in window light and adjust in 10 seconds | Trusting only bathroom lighting |
Habits That Keep Styling Working
Covering looks better when the front hairs stay in decent shape. These habits keep lift and texture easier to get, so you use less product.
Ease Up On Heat And Tension
Use the lowest heat setting that still styles your hair. If you tie hair back often, change the placement and keep it looser. Swap tight elastics for soft scrunchies or spiral ties that pinch less.
Clean Roots, Lighter Conditioner
Buildup makes roots collapse. Spend extra time shampooing the hairline and part, then rinse well. Apply conditioner from mid-lengths to ends so the roots stay airy.
One-Minute Checks Before You Walk Out
Most cover-ups look fine in one mirror and shift in another. Do a quick check under window light, then you’re done for the day.
- Step into natural light and tilt your head slightly down.
- Use your phone camera from arm’s length; screens show gaps mirrors can miss.
- If the front separates into skinny strings, add a touch of dry shampoo and re-lift with fingertips.
- If powder looks heavy, soften it with a clean spoolie.
For touch-ups, a small comb and travel powder fit in a pocket. If you want a line to repeat to yourself on tough mornings, it’s this: you’re building the illusion of density, not gluing hair into place.
And if you’re still experimenting, here’s a simple anchor: how to cover up thinning hair in front usually comes down to part, lift, then blur.
References & Sources
- American Academy of Dermatology (AAD).“Hair loss: Diagnosis and treatment.”Shows how dermatologists evaluate hair loss causes and choose treatment options.
- National Institute of Arthritis and Musculoskeletal and Skin Diseases (NIAMS), NIH.“Alopecia Areata–Hair Loss Symptoms, Types, & Causes.”Outlines alopecia areata patterns, symptoms, and typical medical care routes.

Mo Maruf
I created WellFizz to bridge the gap between vague wellness advice and actionable solutions. My mission is simple: to decode the research and give you practical tools you can actually use.
Beyond the data, I am a passionate traveler. I believe that stepping away from the screen to explore new environments is essential for mental clarity and physical vitality.