A 3D printer for a beginner should inspire creativity, not hours of troubleshooting. The biggest hurdle for new users isn’t the design software — it’s a machine that won’t hold its calibration, clogs mid-print, or requires a physics degree to level the bed. That’s where this category changes the game for the casual maker, the curious student, and the hobbyist who just wants to print a lithophane without a support forum membership.
I’m Mohammad Maruf — the founder and writer behind WellFizz. My focus is on dissecting the hardware, firmware reliability, and real-world print consistency that separates a frustrating box of parts from a true first-machine workhorse.
Resin and FDM machines both have a place, but the reliable choice for a first-time buyer looking for the best cheap 3d printer for beginners comes down to auto-leveling, a direct-drive extruder, and a slicer that doesn’t require manual G-code edits to get a clean benchy.
How To Choose The Best Cheap 3D Printer For Beginners
Three specs separate a beginner-friendly machine from a tinkerer’s project: auto bed leveling, a direct-drive extruder, and a spring steel PEI build plate. The rest — speed, build volume, multi-color capability — matters only after you confirm the first layer sticks.
Auto Bed Leveling — The Dealbreaker
Manual leveling with a piece of paper is the number-one cause of failed first prints. A printer with CR Touch, strain sensor, or inductive probe auto-levels within seconds and compensates for a slightly warped bed. For a beginner, this feature alone separates a 40-minute frustration session from a press-and-walk-away experience.
Direct Drive vs. Bowden Extruder
A direct-drive extruder sits right above the nozzle, giving you precise retraction and the ability to print flexible filaments like TPU without jams. Bowden setups, common on older budget printers, introduce lag and stringing. For a first machine, direct drive removes a whole class of troubleshooting before it starts.
Build Plate Material — Stick, Don’t Glue
A flexible PEI spring steel plate is the gold standard. Parts pop off after a gentle bend — no scraping, no glue stick, no painter’s tape. Glass beds look premium but often require adhesives and can be brittle. PEI is the practical choice for a low-stress start.
Quick Comparison
On smaller screens, swipe sideways to see the full table.
| Model | Category | Best For | Key Spec | Amazon |
|---|---|---|---|---|
| Bambu Lab A1 | FDM | Print‑and‑go reliability | 10,000 mm/s² acceleration | Amazon |
| FLASHFORGE Adventurer 5M | FDM | Sub‑10‑minute setup | 600 mm/s max speed | Amazon |
| Anycubic Kobra X | FDM | Expandable multi‑color | 260 mm³ build volume | Amazon |
| Creality Ender 3 V3 SE | FDM | Tinker‑friendly upgrade path | Sprite direct extruder | Amazon |
| ANYCUBIC Photon Mono 4 | Resin | High‑detail miniatures | 7″ 10K LCD screen | Amazon |
| Entina Tina2 Plus | FDM | Kids and classroom use | 40‑second ceramic hotend | Amazon |
| Entina Tina2S | FDM | Budget entry‑level | 0.04 mm precision | Amazon |
| Creality K1C | FDM | Carbon fiber printing | 300°C high‑temp nozzle | Amazon |
| Bambu Lab P1S | FDM | Enclosed advanced materials | 500 mm/s CoreXY | Amazon |
In‑Depth Reviews
1. Bambu Lab A1

The Bambu Lab A1 redefines what a beginner can expect from an entry-level FDM machine. Its fully automatic calibration handles Z-offset, bed leveling, and input shaping — the user literally taps “print” and walks away. The 10,000 mm/s² acceleration is not a marketing number; it translates to a benchy in under 20 minutes with layer lines so fine you’d think it was resin.
Active flow rate compensation reads the filament’s real-time behavior and adjusts extrusion on the fly, eliminating the stringing and under-extrusion that plague manual calibration. The 1-clip quick-swap nozzle makes maintenance painless — no wrench, no preheating frustration. The AMS Lite upgrade path introduces multi-color printing without replacing the entire machine.
The open frame design requires a ventilated space for ABS, but PLA and PETG print effortlessly. The onboard slicer integration with the Bambu Handy app means you can browse models on your phone, slice wirelessly, and start a print before you even sit down at your desk.
Why it’s great
- Zero manual calibration — auto bed leveling and Z-offset
- Silent operation at ≤48 dB with active noise cancellation
- 10,000 mm/s² acceleration for fast, detailed prints
Good to know
- AMS Lite for multi-color sold separately
- Open frame — not ideal for ABS without enclosure
- Filament clog after prolonged idle can occur
2. FLASHFORGE Adventurer 5M

From unboxing to first print in under 10 minutes — the Adventurer 5M is the fastest setup in this price tier. It comes fully assembled with a one-click auto-leveling system that uses a strain sensor on the nozzle itself, so the first layer is dialed before you even select the file. The CoreXY kinematics push max speeds of 600 mm/s with 20,000 mm/s² acceleration, and the vibration compensation algorithm eliminates ghosting on sharp corners.
The 50-watt ceramic heater brings the nozzle to 200°C in 35 seconds, so you’re not waiting around for preheat cycles. A filament run-out sensor automatically pauses and resumes, and the power-loss recovery means a brownout won’t kill a four-hour print. The dual-sided PEI spring steel plate is removable and flexible — parts pop off with a gentle bend, no scraping.
Build volume of 220 mm³ is adequate for most functional prints, though large cosplay pieces will need splitting. The open design requires good ventilation for PETG and ABS, and the touchscreen interface is responsive but can occasionally freeze requiring a power cycle.
Why it’s great
- True 10‑minute setup with fully assembled frame
- 35‑second nozzle heat-up time
- Vibration compensation eliminates ghosting
Good to know
- Small build volume (220 mm³) limits large projects
- No official enclosure kit available
- Firmware can freeze on rare occasions
3. Creality Ender 3 V3 SE

The Ender 3 V3 SE is the most refined version of the Ender platform — finally with CR Touch auto leveling and a genuine Sprite direct extruder. Assembly takes about 20 minutes, and the strain sensor handles Z-offset automatically, so the “paper test” is a thing of the past. The 250 mm/s print speed with 2,500 mm/s² acceleration is a solid upgrade from the original Ender 3’s glacial 50 mm/s.
The dual Z-axis lead screws are synchronized by a timing belt to reduce wobble, and the Y-axis rides on two hardened steel linear shafts for stability during rapid travel moves. The 32-bit silent mainboard uses advanced stepper drivers that eliminate the high-pitched whine older printers emit. The PC spring steel build plate is textured and flexible — no glue needed for PLA, and bending the plate pops prints off cleanly.
Auto filament loading and unloading is a small but meaningful touch — one tap feeds filament to the nozzle, one tap retracts it. The Sprite extruder handles PLA, PETG, and TPU without jamming. Some users report needing to upgrade the hotend fan for long PETG sessions, and the stock firmware could be more intuitive.
Why it’s great
- Sprite direct extruder handles flexible filaments
- Dual Z-axis and steel linear shafts for stability
- Silent mainboard for bedroom-friendly operation
Good to know
- Assembly still required (20 min)
- Stock cooling fan may need upgrade for long PETG prints
- Interface is utilitarian, not touchscreen
4. Anycubic Kobra X
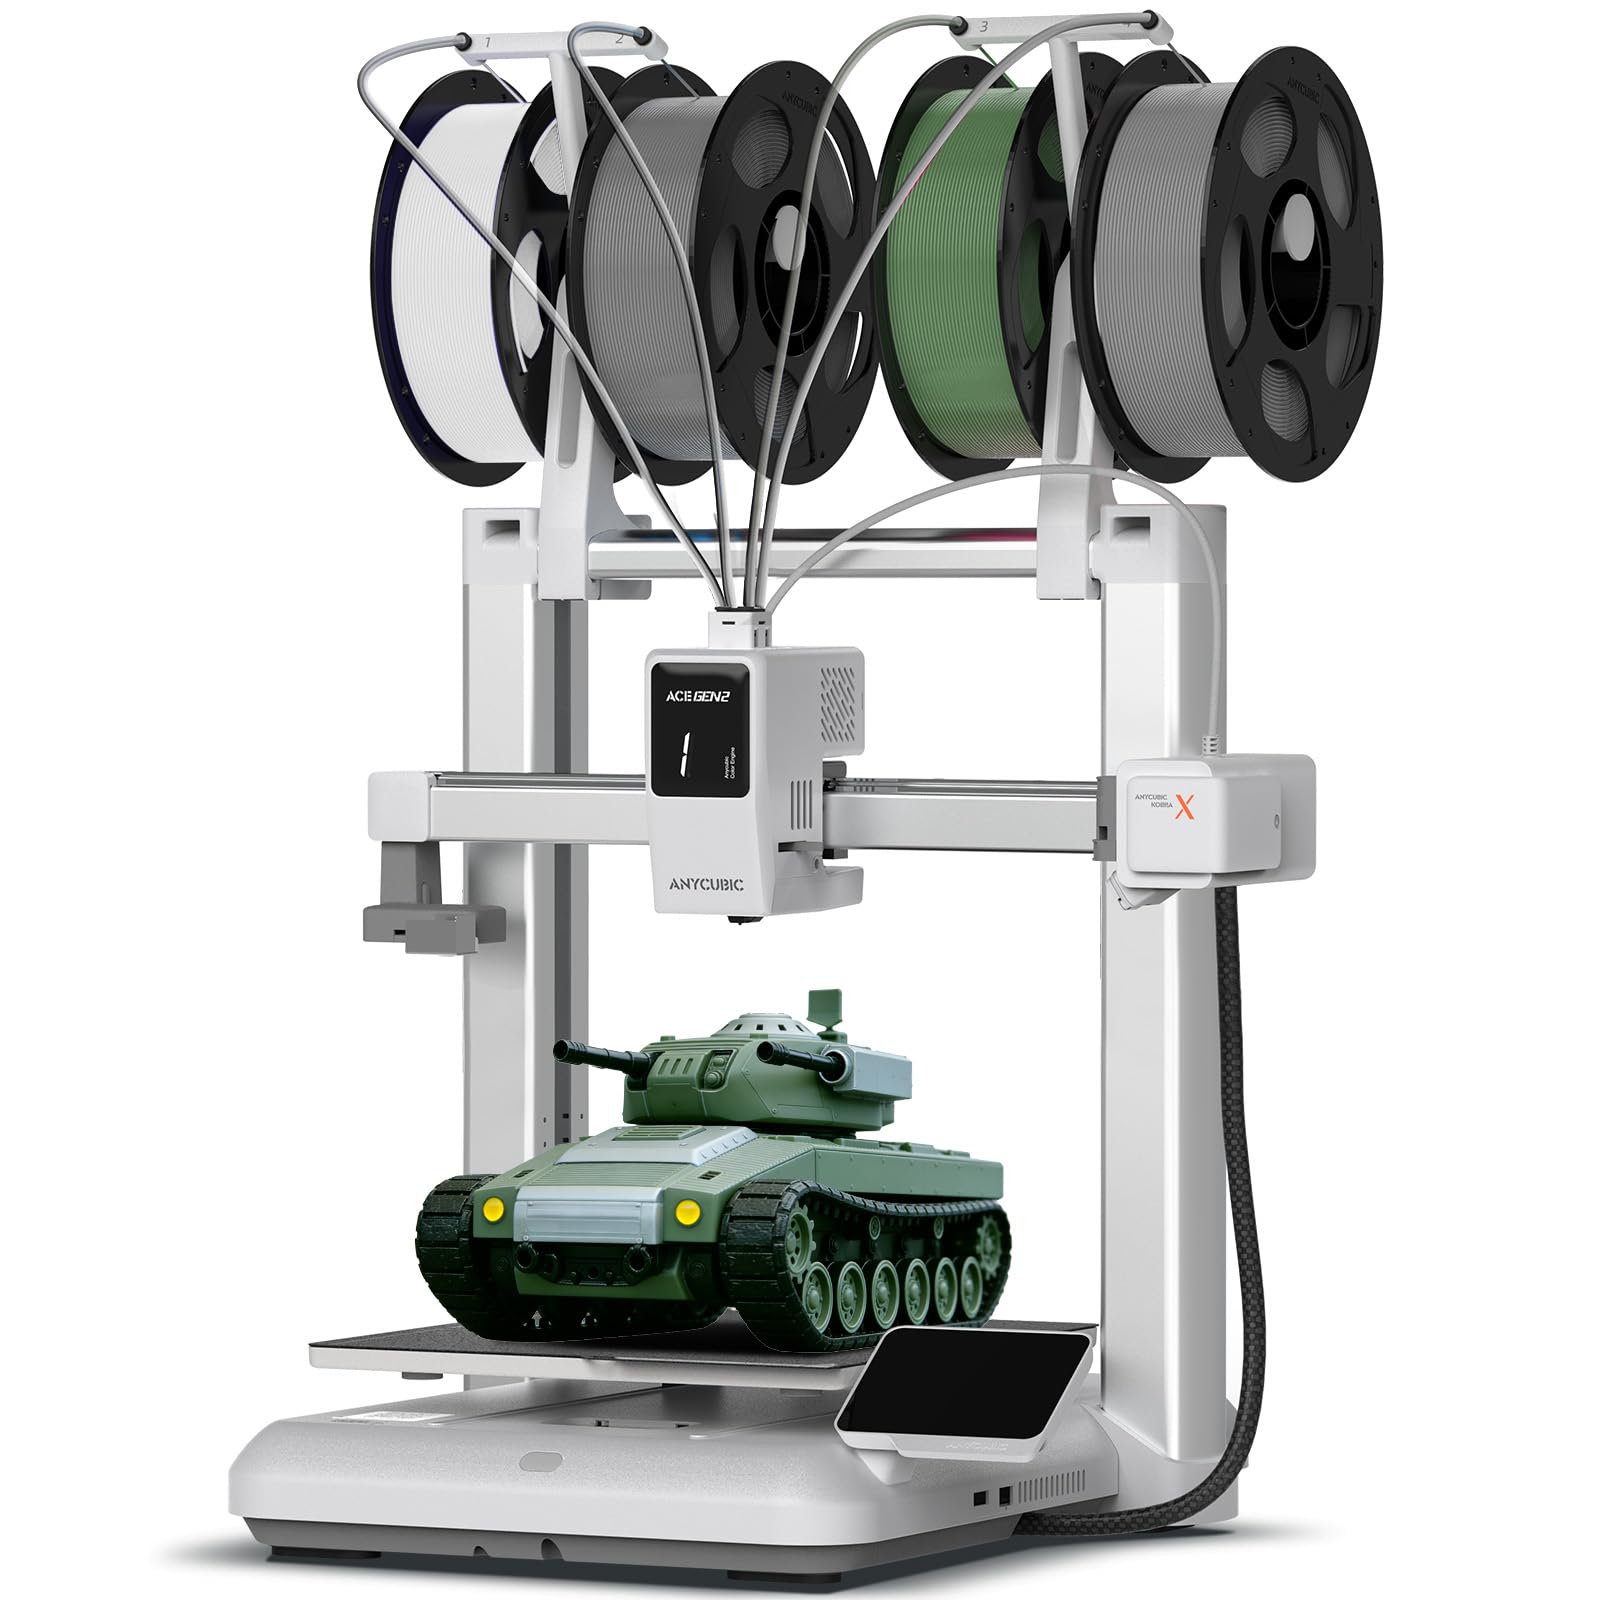
The Anycubic Kobra X packs a 49-point auto leveling system (LeviQ 3.0) that measures the entire bed surface and compensates for any warping — no paper, no guesswork. The 600 mm/s print speed with vibration compensation keeps details sharp even at high feed rates. The 260 mm³ build volume is one of the largest in this tier, accommodating bigger functional parts without splitting them.
What sets the Kobra X apart is its multi-color expandability. With the ACE 2 Pro module (sold separately), it can print up to 19 colors from 4 material slots. The built-in 720P camera provides real-time monitoring and AI spaghetti detection — if the print fails, the machine pauses itself before wasting more filament. The hardened steel nozzle goes up to 300°C, supporting PLA, PETG, TPU, PVA, and even ASA.
Noise levels measure at ≤48 dB during operation, making it unobtrusive for a shared living space. The power-loss recovery and filament run-out sensor protect long prints. Some users report that the multi-color purge block generates significant waste, and the proprietary slicer profiles work best with Anycubic-brand filament.
Why it’s great
- 49-point full-auto leveling for perfect first layers
- Expandable to 19‑color multi-material printing
- AI camera detects spaghetti failures automatically
Good to know
- ACE 2 Pro multi-color unit sold separately
- Purge waste is significant in multi-color mode
- Nozzle change requires specific tools
5. ANYCUBIC Photon Mono 4

For beginners who crave miniature detail, the Photon Mono 4 is a resin printer with a 7-inch monochrome LCD at 10K resolution (9024 x 5120). Each pixel measures just 17 microns on X and Y — that’s finer than the diameter of a human hair. The LighTurbo matrix light source delivers uniform UV curing across the entire build plate, reducing layer lines to virtual invisibility.
The 4-point manual leveling system is beginner-optimized: level once, tighten four screws, and the platform stays true for dozens of prints. The laser-engraved build platform improves adhesion without the lifting and warping common on smooth aluminum plates. Power-loss recovery resumes prints after an interruption, and the updated firmware includes pre-set exposure profiles for popular resins so you don’t have to guess.
The build volume (153 x 87 x 165 mm) is smaller than FDM machines — you will need to resize or split larger models. Resin printing requires PPE and ventilation; the printer itself is odor-controlled but uncured resin is toxic. Some users report the FEP vats are prone to cracking and the LCD screen can cost –50 to replace, so handle the vat with care.
Why it’s great
- 17-micron pixel resolution for exceptional detail
- Pre-set resin profiles — no exposure tuning needed
- Laser-engraved build plate reduces warping
Good to know
- Small build volume limits model size
- Requires ventilation and gloves for resin handling
- FEP vats are delicate and can crack
6. Entina Tina2 Plus

The Tina2 Plus is the only printer in this list that arrives fully assembled — no screws, no frame, no wiring. You unbox it, plug it in, and start printing within minutes. The Poloprint Cloud app offers 1,500+ preloaded models specifically curated for kids and classroom use, eliminating the need to download and slice STL files from scratch.
The ceramic hotend heats to printing temperature in just 40 seconds, and the quick-swap nozzle design makes maintenance simple enough for a supervised 10-year-old. Auto leveling and a dual Z-axis structure ensure the small build plate (99 x 119 x 99 mm) stays level through dozens of prints. The flexible PEI spring steel platform makes parts pop off without tools.
The structural safety design partially encloses the moving and hot components to prevent accidental contact. Some users report the companion app occasionally disconnects or fails to register logins, requiring a device reboot. The built-in model library is good for inspiration but limited for advanced projects, and larger filament spools may need a printed adaptor.
Why it’s great
- Fully assembled — truly unbox and print
- 40-second ceramic hotend saves wait time
- 1,500+ preloaded models via cloud app
Good to know
- Small build volume limits project size
- App connectivity can be unreliable
- Limited to smaller standard spools
7. Entina Tina2S
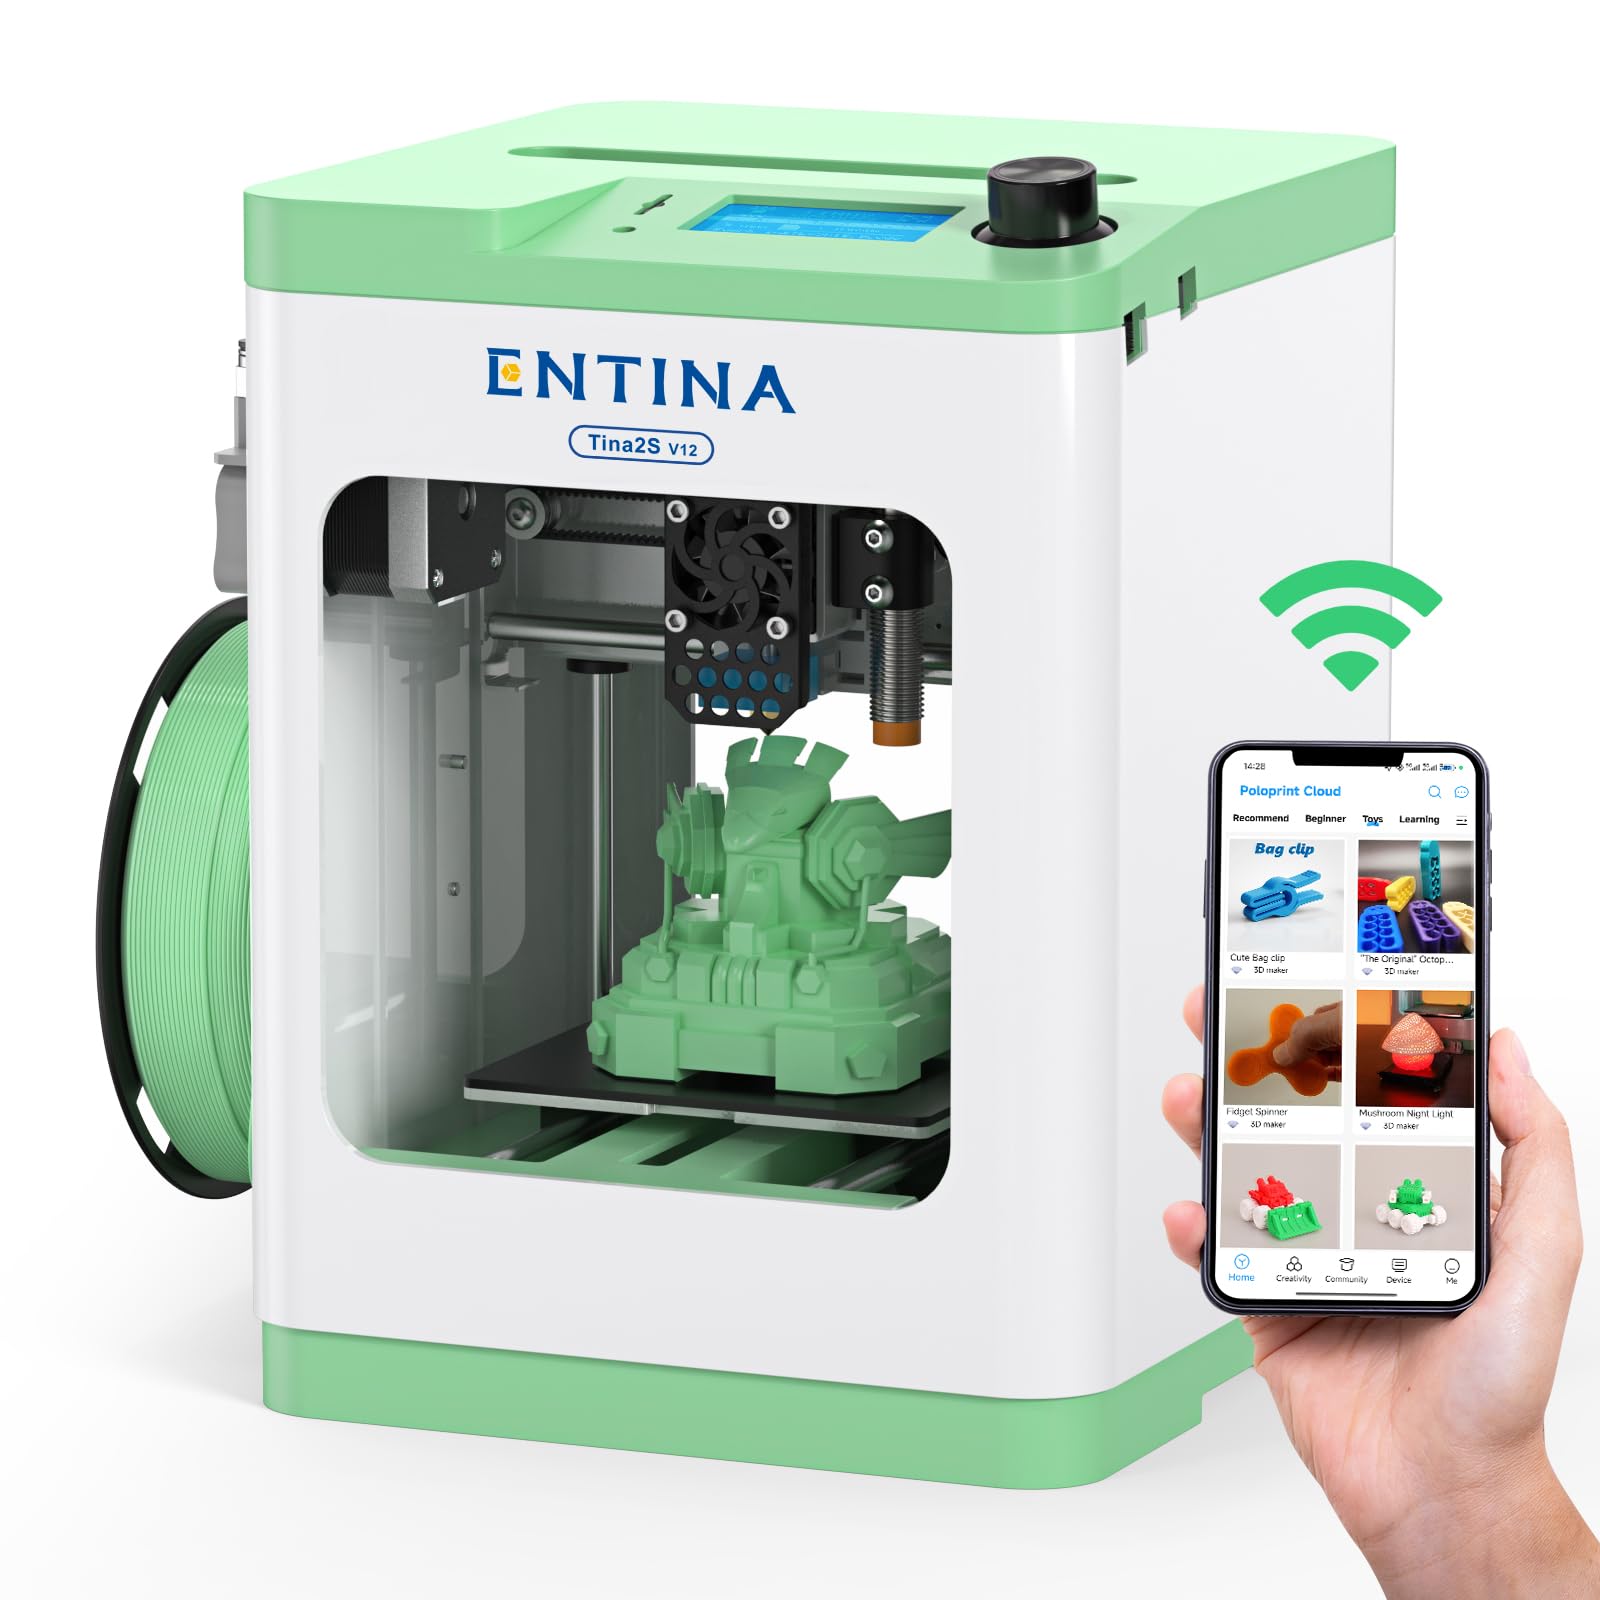
The Tina2S is the entry-level sibling of the Tina2 Plus, designed for the absolute minimum spend. It retains the fully assembled frame, auto bed leveling, and flexible spring steel build plate that make the Plus so beginner-friendly. The 200 mm/s print speed is modest but consistent, and the upgraded WiFi module delivers file transfer five times faster than the previous generation.
The enclosed frame with LED lighting helps kids and beginners monitor the print without exposing hot components. The open-source design supports Cura and Simplify3D, so as you outgrow the Poloprint app, you can switch to a more powerful slicer. The quick-swap nozzle design means you can switch from PLA to PETG without swapping the entire hotend assembly.
The print volume (99 x 119 x 99 mm) is the smallest in this roundup — you are limited to toys, keychains, and small educational models. Some users report the nozzle clogs after extended use, and the customer support response can be slow. For the price, it’s a functional learning tool, not a production machine.
Why it’s great
- Complete out-of-box experience — no assembly
- App access to 1,500+ ready-to-print models
- Upgraded WiFi with 5x faster transfers
Good to know
- Nozzle clogging reported after extended use
- Small build volume (99 mm³) limits projects
- Customer support can be slow to respond
8. Creality K1C

The K1C is Creality’s answer to the enclosed high-speed market, offering 600 mm/s print speed with 20,000 mm/s² acceleration in a fully enclosed frame. The clog-free direct extruder uses a bolster spring and ball plunger to grip filament tightly, and the integrated titanium alloy heatbreak prevents heat creep — a common failure point on cheaper machines. The nozzle reaches 300°C, enabling carbon fiber composites and other high-temp materials.
The AI camera detects spaghetti failures, debris, and other print defects in real time, and can pause automatically. The triple-fan cooling system includes a hotend fan for heat management, a part cooling fan for bridging, and an auxiliary chamber fan to minimize stringing on overhangs. Auto leveling and input shaping are handled automatically before every print — no manual tuning required.
The enclosed design is excellent for ABS and ASA, materials that warp in open air, but the chamber does not actively heat, so Nylon requires additional preparation. Some users note the printer is heavy (27 lb) and loud at higher speeds. The proprietary slicer profiles work best with Creality’s own filament, and third-party profiles need careful configuration.
Why it’s great
- Fully enclosed for high-temp materials
- Three-fan cooling system for bridging and overhangs
- Clog-free extruder with titanium heatbreak
Good to know
- Noisy at high-speed settings
- Heavy (27 lb) — not easily portable
- Proprietary slicer profiles recommended for best results
9. Bambu Lab P1S

The P1S is the enclosed workhorse of the Bambu lineup, delivering 500 mm/s print speed with 20,000 mm/s² acceleration in a fully sealed chamber. Setup takes under 30 minutes — it ships fully assembled and auto-calibrates on first power-on, including bed leveling, Z-offset, and resonance compensation. The CoreXY kinematics produce consistent layer quality at high speed, and the enclosure enables reliable ABS, ASA, and even polycarbonate prints.
Multi-material support scales to 16 colors with the AMS system (sold separately). The Bambu Studio slicer handles filament switching, purge calculations, and waste management automatically. The auto-leveling system probes the bed before every single print, ensuring the first layer is perfect regardless of thermal expansion over long sessions. The dual-gear direct extruder feeds filament precisely, reducing the risk of jams during multi-material swaps.
The build volume (256 mm³) is generous for a desktop enclosed printer. TPU can be tricky due to the closed design causing heat buildup, and the AMS adds significant cost for multi-color users. The community support and firmware updates are excellent, making the P1S a long-term investment rather than a disposable entry-level machine.
Why it’s great
- Fully enclosed for advanced filaments (ABS, ASA, PC)
- Up to 16‑color multi-material via AMS
- Auto-leveling before every print — zero maintenance
Good to know
- AMS multi-color unit sold separately
- TPU struggles in enclosed chassis
- Higher price point than other entry-level options
FAQ
How many hours of setup should a beginner expect?
Which filament should a beginner start with?
Is a resin printer too dangerous for a teenager?
Can a cheap 3D printer print multi-color?
What does the “Layer Height” spec actually mean for print quality?
Final Thoughts: The Verdict
For most users, the best cheap 3d printer for beginners winner is the Bambu Lab A1 because it combines true automatic calibration, reliable direct-drive extrusion, and an intuitive app ecosystem into a package that demands no prior knowledge. If you want a faster setup and a CoreXY frame for high-speed prints, grab the FLASHFORGE Adventurer 5M. And for a kid-friendly classroom machine that arrives fully assembled and ready to print within minutes, nothing beats the Entina Tina2 Plus.

Mo Maruf
I created WellFizz to bridge the gap between vague wellness advice and actionable solutions. My mission is simple: to decode the research and give you practical tools you can actually use.
Beyond the data, I am a passionate traveler. I believe that stepping away from the screen to explore new environments is essential for mental clarity and physical vitality.