A dull, yellowed headlight doesn’t just ruin your car’s look — it cuts nighttime visibility by more than half, turning a routine drive into a safety gamble. The fix isn’t a temporary polish or a quick wipe; it’s a durable, UV-blocking layer that chemically bonds to the polycarbonate lens. That’s where a dedicated ceramic coating for headlights steps in, providing months of clarity by sealing out the sun and road grit that cause oxidation in the first place.
I’m Mohammad Maruf — the founder and writer behind WellFizz. I’ve spent countless hours analyzing automotive protection chemistry, comparing SiO2 concentration levels, and studying real-world wear patterns across different coating formulations to separate marketing claims from measurable performance.
Below, I break down five of the most effective options on the market right now, each chosen for its specific balance of ease, durability, and UV defense. Whether you are restoring neglected lenses or protecting brand-new ones, this guide to the best ceramic coating for headlights gives you the exact specifications you need to make an informed purchase.
How To Choose The Best Ceramic Coating For Headlights
Not every ceramic coating is built for polycarbonate. Paint-grade coatings are formulated for clearcoat and can crack or delaminate on flexible plastic. The right headlight coating must contain UV blockers that specifically neutralize the wavelengths responsible for polycarbonate yellowing, not just general gloss enhancers.
SiO2 Concentration and Hardness Rating
A 10H hardness rating sounds impressive, but on plastic headlights the real metric is flexibility. Coatings with very high SiO2 solids can be brittle. Look for a balanced formula — nanoscale SiO2 particles that bond without creating a stiff film. The best headlight coatings stay slightly elastic to resist thermal expansion and contraction from headlight heat.
Application Method and Surface Prep Requirements
Spray-and-wipe coatings are beginner-friendly but typically offer shorter protection cycles (6–12 months). Vapor-deposited coatings create a harder, more even layer but require sanding and careful heating. Pre-saturated wipes sit in the middle — easy to use but dependent on perfect surface cleanliness. Prioritize a method you will actually complete correctly rather than one that promises the longest theoretical lifespan.
Re-Oxidation Prevention and UV Blocking
Many headlight restoration kits remove oxidation but leave the plastic unprotected, so yellowing returns within weeks. A genuine ceramic coating should include a UV-absorbing additive — not just a clear sealant. Read labels for “UV block” or “UV inhibitor” specifically, not just “protection.” If the product does not mention UV, it is likely only a gloss enhancer.
Quick Comparison
On smaller screens, swipe sideways to see the full table.
| Model | Category | Best For | Key Spec | Amazon |
|---|---|---|---|---|
| Meguiar’s Ultimate Headlight Restoration Kit | Sealant Wipes | 18+ month UV protection | Two grit sandpaper (1000/3000) + sealant wipes | Amazon |
| McKee’s 37 Headlight Protectant Spray | Spray Sealant | Ongoing maintenance on restored lenses | 8 oz bottle covers 10+ headlights | Amazon |
| Atomizing Cup Vapor Restoration Kit | Vapor Deposition | Heavily oxidized, scratched lenses | Stainless steel vapor cup + 100 ml blue ice solution | Amazon |
| Autokcan 10H Nano Ceramic Coating | Liquid SiO2 | DIY broad-surface application (glass, plastic, paint) | 50 ml SiO2 formula, rated 10H hardness | Amazon |
| Meguiar’s Two Step Headlight Restoration Kit | Two-Step Kit | Quick hand-restoration + 12-month coating | 4-count pack with abrasive pads and coating solution | Amazon |
In‑Depth Reviews
1. Meguiar’s Ultimate Headlight Restoration Kit
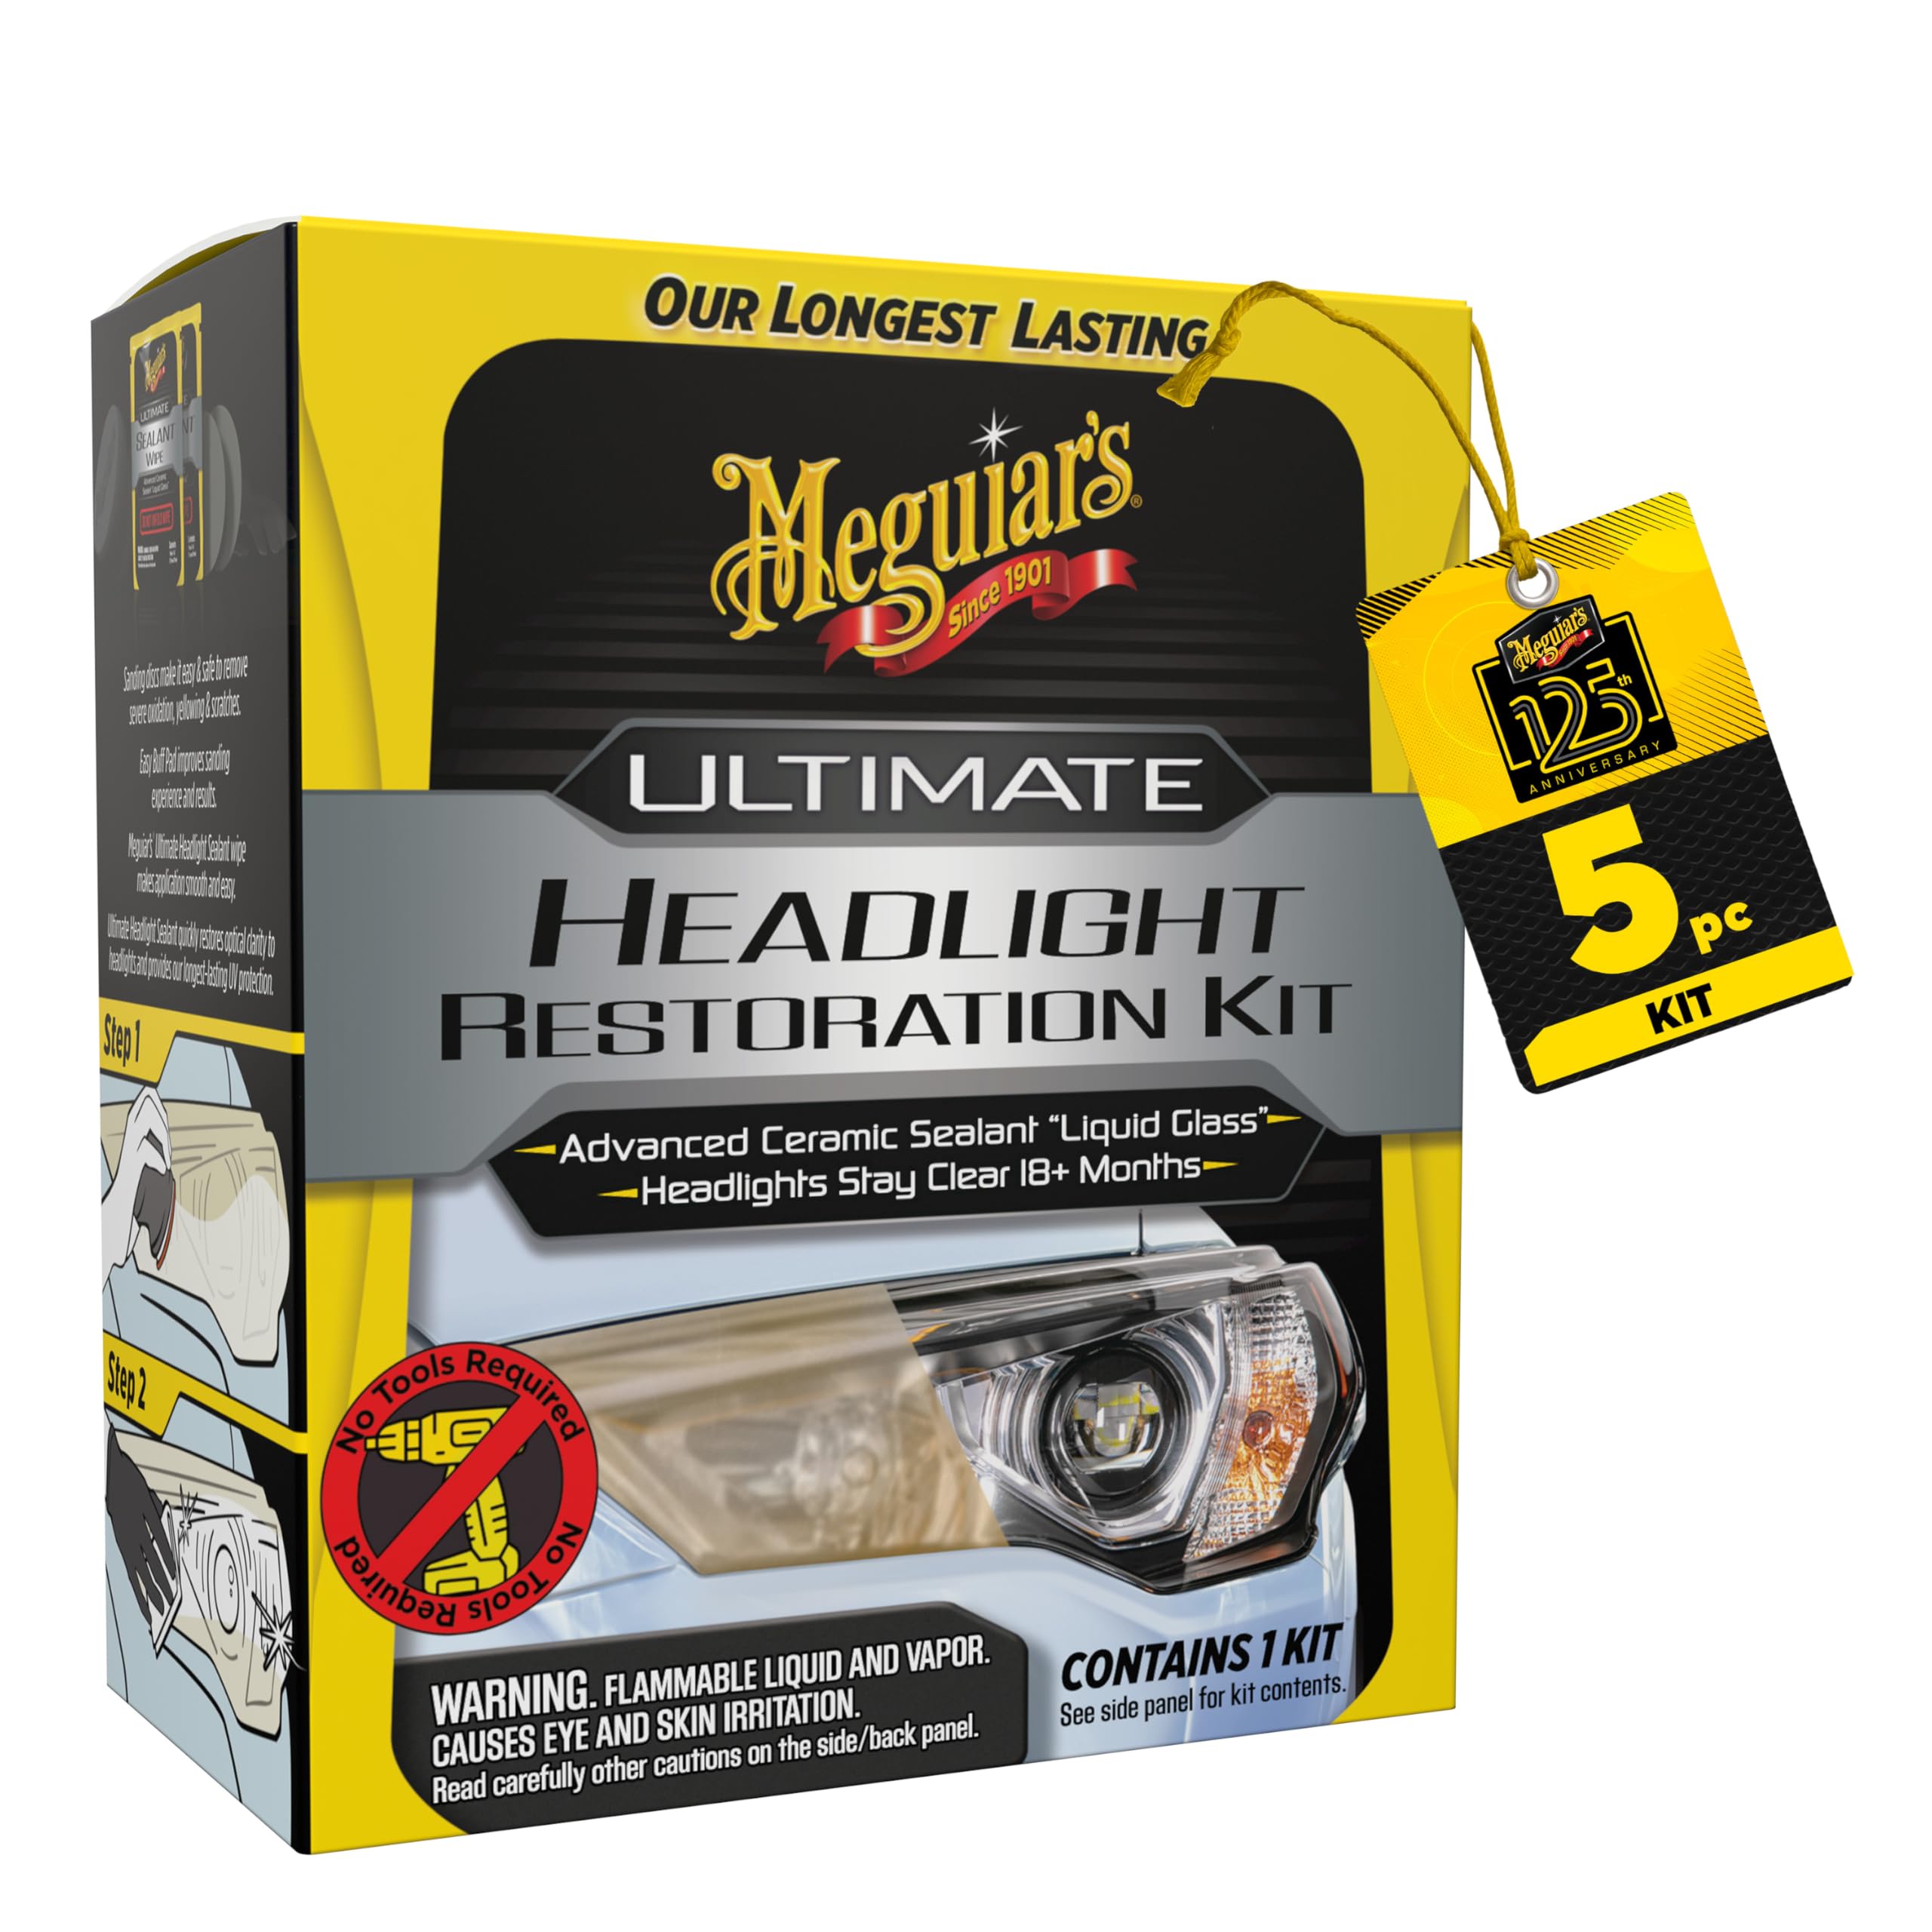
This kit delivers the most complete package for the DIYer who wants professional-level results without a drill. It includes two grades of sandpaper (1000 and 3000 grit) to tackle mild to heavy oxidation, followed by pre-saturated sealant wipes that infuse the plastic with a UV-blocking ceramic layer.
The sealant is the standout here — it dries completely crystal clear and bonds to polycarbonate with enough flexibility to resist cracking from headlight heat cycles. Users consistently report clarity lasting well past the 18-month mark when applied to properly sanded lenses. The wipes make the coating step mess-free, which is rare for a product this durable.
Some packs have reported dried-out wipes straight from the factory, which is a quality-control miss on an otherwise excellent system. That said, Meguiar’s customer service usually replaces defective units quickly. If you have moderate-to-heavy yellowing and want a one-stop solution, this is the most reliable option on the list.
Why it’s great
- All-in-one kit: sandpaper, wipes, and sealant included
- UV-blocking ceramic sealant lasts over 18 months
- No power tools required, hand-application only
Good to know
- Quality control on sealant wipes can be inconsistent
- Not ideal for lenses with deep pitting or physical cracks
2. McKee’s 37 Headlight Protectant Spray

McKee’s 37 takes a different approach — this is a dedicated maintenance spray, not a restoration kit. It uses a polymer-based formula that bonds to clear plastic and creates a sacrificial UV-blocking layer. One 8-ounce bottle can protect over ten headlights, making it the highest-value option per application.
Application is simple: spray directly onto a clean, dry lens and wipe off with a microfiber towel. The formula fills microscopic pores that trap dirt, which keeps clarity high between washes. Users who apply it after every car wash report that their restored lenses stay clear for years with no re-yellowing.
This product only works on already clean or freshly restored headlights — it will not remove existing oxidation. If your lenses are already fogged, you must restore them first before using this as a protective top-coat. It is also a polymer, not a pure SiO2 ceramic, so the hardness is lower than some liquid ceramic coatings.
Why it’s great
- Extremely easy spray-on, wipe-off application
- Excellent UV protection for maintaining restored lenses
- High value per bottle — covers ten headlights
Good to know
- Does not remove oxidation; requires pre-restored lenses
- Polymer-based, not a pure ceramic (lower hardness than SiO2 coatings)
3. Atomizing Cup Vapor Restoration Kit

This is the most unconventional product in the lineup — it uses a heated stainless steel cup to vaporize a restoration fluid, which then condenses onto the headlight lens. The result is a smooth, factory-like layer that fills micro-scratches and minor pitting far better than any wipe-on coating can. The kit includes six grades of sandpaper for initial prep.
The vapor deposition process creates an exceptionally even coating with strong adhesion. Users with 10-year-old heavily oxidized lenses report near-new visual results after a single session. The blue ice solution contains UV-blocking compounds that help prevent future yellowing, and the transparency is noticeably higher than thick liquid coatings.
The power adapter is a 12-volt cigarette lighter plug, not a standard AC outlet, which limits where you can use it. Also, the cup needs to be handled carefully when hot — shaking it to speed heating requires caution. Refill fluid is proprietary, and some users have substituted 100% acetone, but that voids any longevity guarantee.
Why it’s great
- Vapor deposition fills micro-scratches better than liquid coatings
- Kit includes six sandpaper grades for complete surface prep
- Creates a highly transparent, factory-smooth finish
Good to know
- Uses a 12V cigarette lighter plug (no AC adapter included)
- Heated cup requires careful handling to avoid burns
4. Autokcan 10H Nano Ceramic Coating

This is a general-purpose SiO2 ceramic coating that works on headlights, taillights, glass, and painted surfaces. The 10H hardness rating is typical for paint-grade coatings, but its nanoscale SiO2 particles are small enough to bond to plastic without forming a rigid film. It delivers strong hydrophobic beading — water sheets off completely after application.
Users praise its forgiving nature on headlights: unlike some paint coatings that leave high-spot streaks on plastic, this one levels out well if applied in straight lines and buffed within 60 seconds. The 50 ml bottle is enough for two full coats on a typical car’s headlights and taillights, plus a third coat if you work thin.
Proper prep is non-negotiable — the coating will only last up to 12 months if the plastic is completely free of wax, oil, and old sealant. Many users recommend a full polish and an IPA wipe-down before applying. For plastic-only use, a dedicated headlight coating may be simpler, but this is an excellent all-arounder if you also want to coat your paint and wheels.
Why it’s great
- Versatile — works on headlights, paint, glass, and plastic
- Strong hydrophobic beading that lasts months
- Forgiving application on plastic surfaces
Good to know
- Requires thorough IPA wipe-down before coating
- 24-hour curing time before exposing to wet driving
5. Meguiar’s Two Step Headlight Restoration Kit

This two-step kit uses abrasive pads and a cleaning solution to manually remove oxidation by hand, followed by a dedicated headlight coating spray. It is the least intimidating option for someone who has never restored headlights before — no drill, no sandpaper grit decisions, and no timing pressure. The coating spray is a ceramic-infused sealant that protects against re-oxidation for up to 12 months.
Users consistently note that the finishing spray is the key to long-term results: it provides the durable UV barrier that the abrasive step cannot deliver alone. When used as directed, this kit produces noticeable clarity improvement even on moderately yellowed lenses. The abrasive pads are textured enough to remove surface oxidation without scratching, so beginners have a high success rate.
For moderate to heavy oxidation, the included abrasive paste may not be aggressive enough — multiple reviews recommend augmenting with Meguiar’s 501 Ultra-Cut Compound for the sanding step. The final coating also shows some minor scuff marks on extremely rough lenses when headlights are on. It is the best entry-level kit, but not the most thorough for seriously neglected plastic.
Why it’s great
- Easiest application — no drill or sandpaper required
- Ceramic coating spray provides 12-month UV protection
- High success rate for first-time users
Good to know
- Abrasive paste may need supplementing for heavy oxidation
- Final coating can show scuffs on severely pitted lenses
FAQ
Can I use car paint ceramic coating on plastic headlights?
How long does a ceramic coating last on headlights?
Do I need to sand my headlights before applying a ceramic coating?
Final Thoughts: The Verdict
For most users, the best ceramic coating for headlights winner is the Meguiar’s Ultimate Headlight Restoration Kit because it combines thorough restoration (1000/3000 grit sandpaper) with a ceramic sealant that delivers over 18 months of UV protection in a simple wipe-on format. If you want a low-maintenance spray to keep already clear lenses fresh, grab the McKee’s 37 Headlight Protectant Spray. And for heavily scratched or pitted lenses that need a near-factory finish, nothing beats the Atomizing Cup Vapor Restoration Kit.

Mo Maruf
I created WellFizz to bridge the gap between vague wellness advice and actionable solutions. My mission is simple: to decode the research and give you practical tools you can actually use.
Beyond the data, I am a passionate traveler. I believe that stepping away from the screen to explore new environments is essential for mental clarity and physical vitality.