Trim only the hairs that peek past the nostril edge with a clean trimmer or rounded scissors, and leave the deeper hairs in place.
Nose hair is one of those grooming tasks you rarely plan. You spot a stray in the mirror, you feel a light tickle, and you want it gone right then. Done right, it’s a quick tidy-up that keeps you looking neat on camera and in person.
This page gives a clear way to groom without going too far. You’ll get a simple choice: a nose trimmer for speed, or rounded scissors for precision. You’ll get cleaning steps, angles that reduce nicks, and signs that mean it’s time to stop.
If you searched for how to remove nasal hair at home, you’re likely after one thing: no visible strays. That’s the target here. You’re trimming what shows, not stripping your nostrils bare.
Why Nose Hair Deserves A Light Touch
Nasal hair isn’t random fluff. Those short, coarse hairs near the entrance act like a basic filter that catches dust and bits of debris before they dry your nose out. When you remove too much, you can end up with a dry, stingy feeling that makes you regret the whole idea.
The goal is a tidy edge. If hair is visible from a normal distance, trim it. If it sits deeper and you can’t see it without pulling your nostril open, leave it alone.
There’s a second reason to stay gentle: the skin inside the nose is thin. Pulling hair out by the root can irritate the follicle and create a tiny opening where germs can settle. That’s why most clinician advice leans toward trimming instead of yanking.
At-Home Options Compared Before You Start
Each method has a place, and each has a “don’t do that” edge. Use the chart to pick what matches your comfort level, your budget, and how fast you want results.
| Method | Best Use | Watch Outs |
|---|---|---|
| Battery nose trimmer | Fast cleanup of visible strays | Don’t push deep; trim the rim only |
| Rounded-tip scissors | One or two long hairs near the edge | Work in good light; slow snips |
| Trimmer with guard comb | Reducing bulk without going short | Rinse and dry the guard after use |
| Manual rotary trimmer | No batteries, travel-friendly | Needs steady hand; clean the blades |
| Plucking with tweezers | Almost never worth it | Can inflame follicles and cause bumps |
| Nose waxing kits | Not a first choice for home use | Pulls hair from the root; irritation is common |
| Hair removal creams | Avoid inside the nostril | Chemicals can burn delicate nasal skin |
| Mini grooming scissors + comb | Trimming just what peeks out | Comb stays outside the nose |
Most people end up rotating between two tools: a trimmer for routine upkeep, and rounded scissors for the lone rogue hair that keeps coming back. Stick with that pair and you’ll avoid most trouble.
What To Skip Inside Your Nose
Some methods sound tempting because they last longer. Inside the nostril, they can backfire. Plucking and waxing remove hairs from the root, which can irritate follicles and raise the odds of painful bumps or infection. In Cleveland Clinic’s nose hair notes, clinicians flag plucking as a common trigger for nasal vestibulitis. That’s the sort of hassle you can skip.
Hair removal creams fall in the same “nope” pile. Those formulas are meant for tougher skin. The lining just inside your nose is delicate and can react with burning, redness, and lingering soreness. Stick to trimming; you’re set.
If you want a medical-center take, Ohio State’s Wexner Medical Center leans toward cutting instead of plucking or waxing because trimming is less likely to upset the follicle. That lines up with the simplest home plan—keep it to trimming and stay near the rim. It keeps the filter hairs doing their job.
How To Remove Nasal Hair At Home With A Trimmer
A purpose-built nose trimmer is the easiest option for most people. It’s designed to cut without a sharp blade scraping your skin. Your job is to keep it clean, keep it shallow, and use short passes.
Prep That Takes 30 Seconds
- Wash your hands, then rinse your nostrils with warm water in the shower or at the sink.
- Dry the area well. Wet hair clumps and can hide what you’re trimming.
- Stand under a bright light and use a mirror that doesn’t warp your view.
- Wipe the trimmer head with 70% isopropyl alcohol if the maker allows it, or wash it per the manual and dry it fully.
Trimming Steps That Reduce Nicks
- Turn the trimmer on before it touches skin. That keeps it from catching.
- Use your free hand to lift the tip of your nose a bit. You only need to see the rim.
- Rest the trimmer at the entrance and make small circles along the edge. Think “around,” not “in.”
- Pause every few seconds, check the mirror, and stop once the stray hairs no longer show.
Clean-Up Right After
Tap the trimmer over the sink to drop cut hairs. Rinse the head if it’s waterproof, then dry it so it doesn’t rust. If your device uses oil, add one small drop to the cutting head and wipe off any extra so it doesn’t end up in your nose next time.
When you’re done, take a breath through your nose. If it feels scratchy, you likely trimmed too close to the lining. Next time, stay nearer the edge and leave a little length.
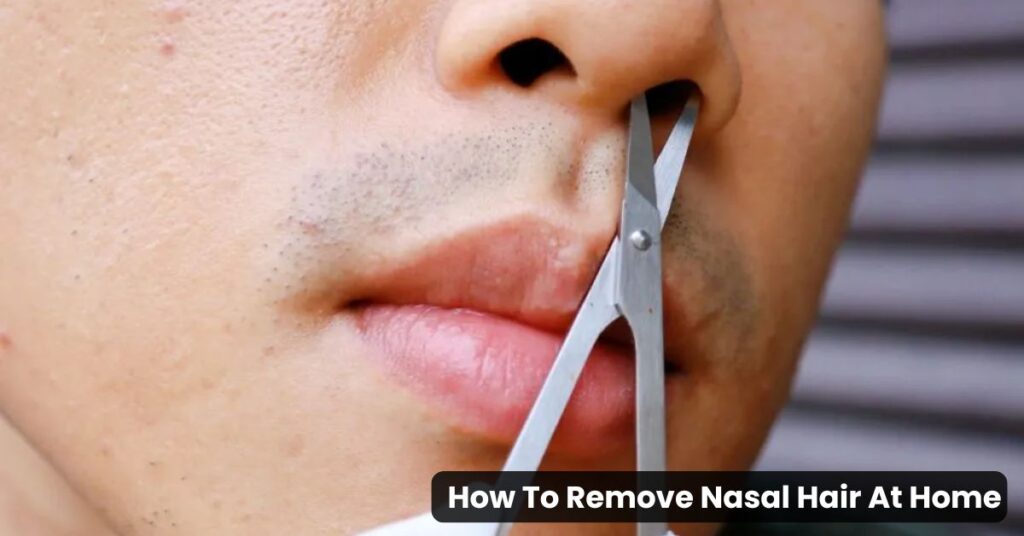
Using Rounded Scissors For Stray Hairs
Scissors work well when you have one or two long hairs at the edge and you don’t want to drag out a trimmer. Use only scissors with rounded tips made for grooming. Kitchen scissors and sharp pointy blades don’t belong near your nostrils.
Scissor Technique That Stays Controlled
- Wash and dry your hands, then blow your nose so you’re not working around moisture.
- Hold the scissors in your dominant hand and rest your elbow against the sink or counter. That brace keeps your hand steady.
- With the other hand, lift the tip of your nose. Aim only at hairs that sit at the edge.
- Make tiny snips. Stop after each snip and check. One clean cut beats five frantic ones.
- Never cut against the inner lining. If you can’t see the blade tips clearly, pull back and reset.
When Scissors Beat A Trimmer
Scissors shine for precision. They’re quiet, they don’t tug, and they let you take off a single hair without touching the rest. If you get dryness after trimming, using scissors at the rim can help you leave more length where it matters.
Hygiene Rules That Keep Irritation Down
Clean tools matter more than speed. A trimmer head that’s full of old hair and skin oil can spread bacteria from last time. Make cleaning part of the routine, not a once-a-year chore.
After each session, remove the head if the device allows it, brush out debris, rinse or wipe per the manual, then dry. Store it somewhere dry. A steamy shower ledge is a bad home for metal parts.
Skin care inside the nose should stay simple. If you feel dry after trimming, a saline spray can help. Skip scented balms and strong creams inside the nostril, since they can irritate the lining.
Aftercare And Troubleshooting
Most trims feel like nothing at all. If something feels off, it’s usually a minor fix. The table below gives a quick map for what you’re feeling and what to do next.
| What You Notice | Likely Cause | Next Step |
|---|---|---|
| Stinging right after trimming | Cut too close to the lining | Rinse with saline, then wait a week before trimming again |
| Small spot of bleeding | Nick at the edge | Pinch the soft part of the nose for a few minutes and keep tools away until healed |
| Tender bump near the entrance | Inflamed follicle after plucking or close trimming | Warm compress for 10 minutes, twice daily; stop trimming that area for a bit |
| Crusty soreness that lingers | Irritation plus bacteria growth | Pause grooming and reach out to a clinician if it keeps getting worse |
| Itchy tickle returns in a few days | You trimmed the rim but missed a longer hair | Use rounded scissors for the single stray instead of re-trimming everything |
| Uneven look on one side | One nostril trimmed shorter | Let it grow out for a week, then do a light pass on both sides |
| Burning after using cream | Chemical irritation | Rinse with cool water and stop using creams inside the nostril |
A Simple Routine You Can Repeat
Most people only need to tidy up every week or two. Start with a quick mirror check in daylight. If nothing shows, you’re done.
If you sneeze mid-trim, set the tool down, regroup, and start again once you’re steady.
If you’re keeping a grooming routine, treat nose hair like eyebrow stray hairs: small touch-ups, no overwork. If you searched for how to remove nasal hair at home because you’re tired of seeing it in photos, this rhythm keeps the look clean without turning it into a hassle.
One extra trick: use a dab of saline spray on a tissue and wipe the rim after trimming. It lifts loose clippings that can poke later. If your nose runs after trimming, that’s normal. Blow gently, not hard. Rinse the trimmer head, pat it dry, and leave it out to air-dry so it’s clean, ready next time you trim again.
Two-Minute Checklist Before You Trim
- Bright light and a clear mirror
- Clean hands and a dry nostril edge
- Trim only what shows at the rim
- Stop as soon as strays disappear
- Clean and dry the tool right away
When To Pause And Get Help
If you get repeated bleeding, ongoing soreness, or swelling that doesn’t calm down, stop grooming the area and reach out to a clinician. Nose skin heals fast, but it doesn’t like repeated irritation.
References & Sources
- Cleveland Clinic.“Why Nose Hairs Grow So Long.”Explains why trimming is preferred and why plucking can lead to irritation and nasal infections.
- Ohio State Wexner Medical Center.“Should I Trim My Nose Hair?”Clinician guidance that favors cutting over plucking or waxing to lower follicle irritation.

Mo Maruf
I created WellFizz to bridge the gap between vague wellness advice and actionable solutions. My mission is simple: to decode the research and give you practical tools you can actually use.
Beyond the data, I am a passionate traveler. I believe that stepping away from the screen to explore new environments is essential for mental clarity and physical vitality.